Digital Marketing Company Delhi, Digital Marketing Services in Delhi, Digital Branding Agency Delhi, SEO Services, Website Designing Company Delhi, Digital Branding Agency
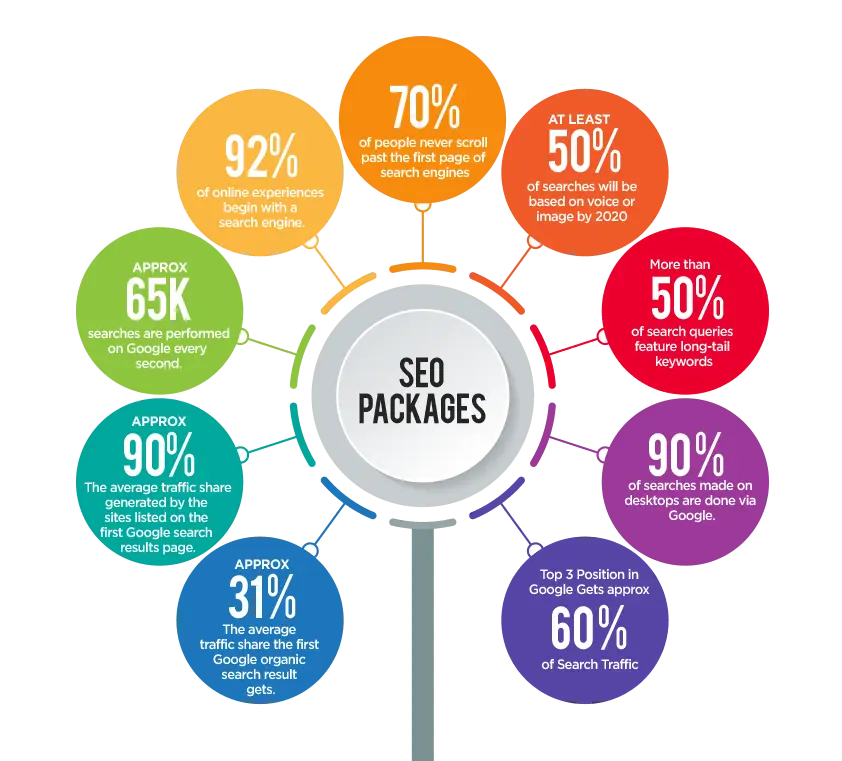
In the ever-evolving digital landscape, Search Engine Optimization (SEO) has become a pivotal factor in determining the online success of businesses.
SEO is a dynamic and multifaceted approach that aims to enhance a website’s visibility on search engines, driving organic traffic and improving overall online presence. As businesses recognize the importance of SEO, the demand for comprehensive and structured SEO services has given rise to the concept of SEO packages.
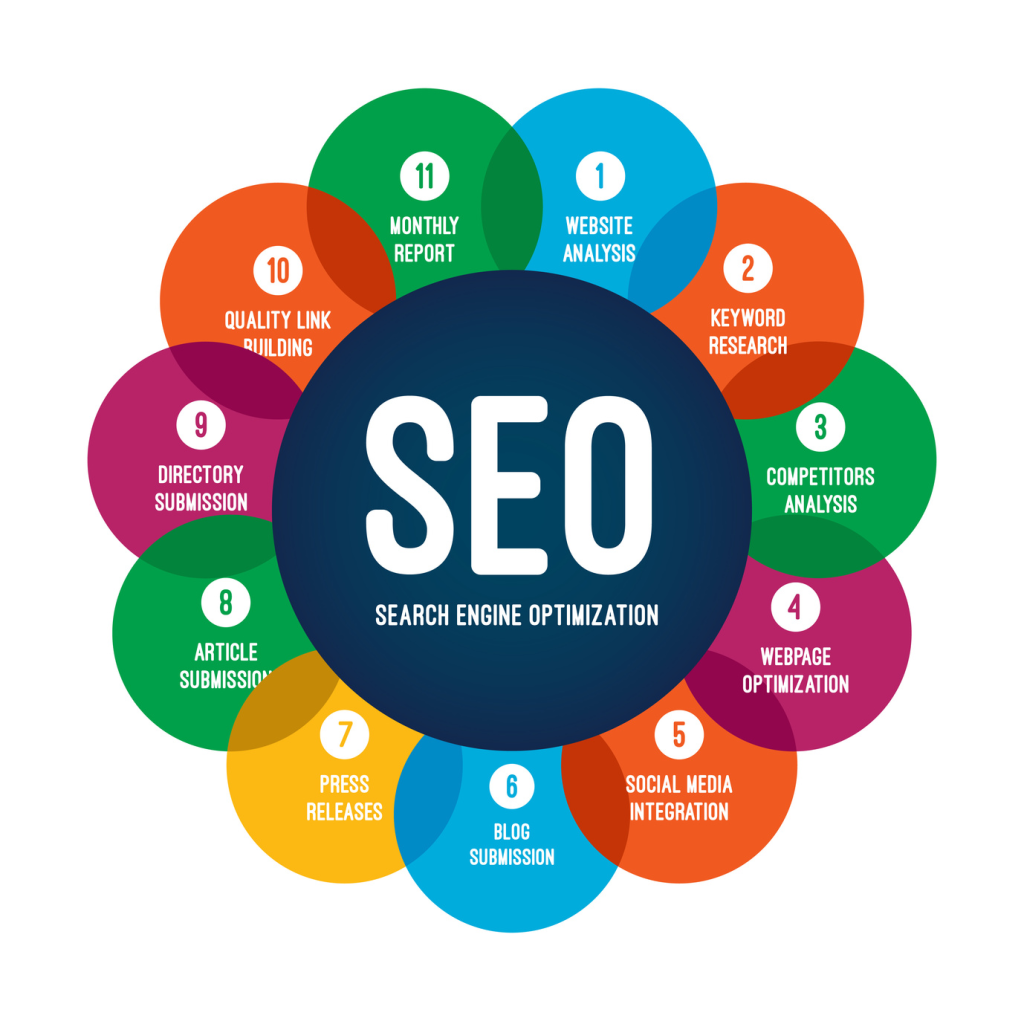
SEO packages are pre-packaged sets of services offered by SEO agencies or professionals to address the diverse needs of businesses seeking to optimize their online performance. These packages typically include a range of strategies and techniques aimed at improving a website’s search engine rankings, boosting organic traffic, and ultimately, increasing conversions.
a. Keyword Research and Analysis: One of the fundamental aspects of SEO packages is the identification of relevant keywords. This involves thorough research to understand the terms and phrases potential customers use when searching for products or services. SEO packages often include keyword analysis tools and strategies to optimize content for these keywords.
b. On-Page Optimization: On-page SEO focuses on optimizing individual web pages to improve their search engine rankings. This includes optimizing meta tags, headers, and content, ensuring proper keyword placement, and enhancing the overall user experience. SEO packages typically include on-page optimization as a foundational element.
c. Off-Page Optimization: Off-page SEO involves activities conducted outside the website to improve its online authority and credibility. This includes building high-quality backlinks, social media engagement, and other external factors that influence search engine rankings. SEO packages may include link-building strategies to enhance off-page optimization.
d. Technical SEO: Technical SEO addresses the backend aspects of a website to ensure it is easily crawlable and indexable by search engines. SEO packages often include technical audits, addressing issues like site speed, mobile responsiveness, and crawlability, to enhance the overall performance of the website.
e. Content Creation and Optimization: Content is a crucial component of SEO. SEO packages frequently include content creation and optimization strategies to ensure that the website offers valuable and relevant information to its audience. This may involve blog posts, articles, infographics, and other types of content.
f. Monitoring and Reporting: Effective SEO packages provide ongoing monitoring and reporting. This includes regular analysis of website performance, tracking keyword rankings, and providing insights into the impact of implemented strategies. Transparent reporting is essential for clients to understand the value of the SEO services they are receiving.
a. Starter Packages: Starter SEO packages are designed for small businesses or those new to SEO. They typically include basic on-page optimization, keyword research, and minimal off-page activities. These packages are ideal for businesses with limited budgets or those testing the waters of SEO.
b. Standard Packages: Standard SEO packages offer a more comprehensive set of services compared to starters. They often include a broader range of keywords, more extensive on-page and off-page optimization, and regular reporting. Standard packages are suitable for businesses with moderate competition in their industry.
c. Advanced Packages: Advanced SEO packages are tailored for businesses in competitive industries or those seeking a robust online presence. These packages encompass advanced strategies such as in-depth competitor analysis, intensive link-building campaigns, and ongoing content creation. They are suitable for established businesses with higher budgets.
d. Local SEO Packages: Local SEO packages focus on optimizing a business’s online presence for local searches. These packages include strategies like Google My Business optimization, local citation building, and geographically targeted content creation. Local SEO is crucial for businesses that rely on local customers.
e. E-commerce SEO Packages: E-commerce SEO packages are specialized for online retailers. They address specific challenges such as product page optimization, handling duplicate content issues, and implementing strategies to enhance product visibility on search engines. E-commerce SEO is essential for online stores looking to maximize their online sales.
a. Scope of Services: The extent of services included in an SEO package significantly influences its pricing. More comprehensive packages that encompass a wide range of strategies and ongoing efforts generally come with a higher price tag.
b. Industry Competitiveness: The level of competition within a specific industry affects the complexity of SEO strategies required. In highly competitive sectors, businesses may need more advanced and aggressive SEO packages, leading to higher costs.
c. Geographic Targeting: Businesses targeting a local audience or operating in specific geographic locations may require localized SEO efforts. Localized SEO packages often differ in pricing based on the scope and intensity of the targeted geographic areas.
d. Business Goals: The goals of a business, whether it’s brand awareness, lead generation, or e-commerce sales, impact the type of SEO services needed. SEO packages are often tailored to align with these specific business objectives.
e. Duration of Engagement: SEO is an ongoing process, and package pricing may vary based on the duration of the engagement. Long-term commitments or retainer-based packages may offer more favorable pricing compared to shorter-term arrangements.
f. Customization and Flexibility: Some businesses may have unique needs that require a more customized approach. SEO agencies may offer flexibility in tailoring packages to accommodate specific requirements, which can influence pricing.
a. Assessing Business Goals: Before selecting an SEO package, businesses must define their goals. Whether it’s increasing website traffic, improving online visibility, or boosting sales, understanding these objectives helps in choosing a package that aligns with specific needs.
b. Budget Considerations: While it’s tempting to opt for the most comprehensive package, businesses need to realistically assess their budget constraints. Choosing a package that strikes a balance between affordability and effectiveness is crucial.
c. Industry Research: Conducting thorough research on industry competitors and their SEO strategies can provide insights into the level of competition. This information helps in selecting an SEO package that addresses the unique challenges within the industry.
d. Client Reviews and Testimonials: Reading client reviews and testimonials of SEO agencies can offer valuable insights into their track record and the effectiveness of their packages. Positive reviews and case studies can instill confidence in the chosen service provider.
e. Transparency and Communication: Choose an SEO agency that emphasizes transparency and clear communication. A reputable agency should provide detailed reports on the progress of implemented strategies and be accessible for discussions and clarifications.
f. Scalability: Businesses should consider whether the chosen SEO package allows for scalability. As a business grows, its SEO needs may evolve, and the selected package should accommodate these changes or offer options for upgrading.
Conclusion:
SEO packages play a pivotal role in the success of businesses seeking to establish a strong online presence. As the digital landscape continues to evolve, the need for strategic and comprehensive SEO services becomes increasingly apparent. By understanding the core components, types, factors influencing pricing, and considerations for choosing the right SEO package, businesses can make informed decisions that align with their goals and budget.
In the competitive online arena, investing in a well-designed SEO package is not just a choice but a strategic imperative. The right package can propel a business to new heights, ensuring it stands out amidst the vast sea of online competitors. As businesses navigate the complexities of the digital realm, a well-executed SEO strategy remains a cornerstone for sustained success.
In the ever-evolving digital landscape, small businesses face a myriad of challenges when trying to establish their online presence. Among the crucial strategies to overcome these challenges, Search Engine Optimization (SEO) plays a pivotal role.
For small businesses with limited resources, investing in SEO monthly packages proves to be a strategic and cost-effective approach. This article explores the significance of SEO monthly packages for small businesses, shedding light on the benefits they bring to the table.
One of the primary advantages of opting for SEO monthly packages is the assurance of consistent visibility in search engine results. Search engines constantly update their algorithms, and staying on top of these changes is a daunting task for small business owners. Monthly SEO packages provide a dedicated team of professionals who can adapt to algorithm updates and implement strategies to maintain or improve visibility.
SEO is an ongoing process that requires regular attention to produce tangible results. For small businesses operating on tight budgets, monthly packages offer a cost-effective solution compared to hiring an in-house SEO team or outsourcing individual services. These packages often bundle various SEO services, providing a comprehensive and affordable solution for businesses looking to enhance their online presence.
Each small business has unique goals, target audiences, and competition landscapes. SEO monthly packages are tailored to the specific needs of the business, taking into account its industry, target market, and growth objectives. This customization ensures that the SEO strategies implemented align with the business’s goals, leading to more effective and targeted outcomes.
SEO is not a one-time task but a continuous process that requires monitoring and adjustment. Monthly packages typically include regular reporting and analysis, allowing small businesses to track the performance of their SEO campaigns. This continuous feedback loop enables businesses to make informed decisions based on real-time data, ensuring that the strategies in place are yielding positive results.
Quality content is at the heart of successful SEO. Monthly SEO packages often include content optimization services, ensuring that the website’s content aligns with relevant keywords and meets the standards set by search engines. This includes regular updates, keyword research, and the creation of fresh, engaging content – all crucial elements in improving search engine rankings.
Establishing a robust online presence involves more than just on-page optimization. Off-page SEO, particularly link building, is a critical aspect of improving search engine rankings. Monthly packages typically include link building strategies to enhance a website’s authority and credibility in the eyes of search engines, ultimately leading to improved rankings.
Industries are dynamic, with trends and consumer behaviors constantly evolving. SEO monthly packages empower small businesses to stay ahead of industry changes by adjusting their strategies accordingly. Whether it’s a shift in consumer preferences, emerging technologies, or new competitors entering the market, a dedicated SEO team can adapt the business’s online presence to align with these changes.
For many small businesses, local visibility is crucial. SEO monthly packages often include localized strategies to improve the business’s visibility in specific geographic areas. This is particularly beneficial for brick-and-mortar businesses or service providers targeting a local customer base, as it ensures that the business appears prominently in local search results.
In a competitive online landscape, standing out is essential. SEO monthly packages provide small businesses with the tools and expertise needed to gain a competitive edge. By consistently optimizing and fine-tuning their online presence, businesses can outperform competitors and capture the attention of their target audience.
As small businesses grow, their SEO needs evolve. Monthly packages offer scalability, allowing businesses to adjust the level of service based on their changing requirements. This flexibility ensures that the SEO strategy remains aligned with the business’s growth trajectory, providing a seamless transition as the business expands its online footprint.
Conclusion:
In the digital age, establishing a robust online presence is indispensable for the success of small businesses. SEO monthly packages offer a comprehensive and adaptable solution, addressing the unique challenges faced by smaller enterprises.
From consistent visibility and cost-effectiveness to customized strategies and adaptability, the importance of SEO monthly packages for small businesses cannot be overstated. By investing in these packages, small businesses can navigate the complexities of the digital landscape, enhance their online visibility, and ultimately achieve sustainable growth.
In the dynamic landscape of digital marketing and search engine optimization (SEO), staying on top of the latest trends and updates is crucial for maintaining a strong online presence.
In 2024, SEO professionals and website owners continue to face challenges related to search engine indexing. One of the most common issues is the “Discovered – Currently Not Indexed” status, which can hamper a website’s visibility on search engines like Google.
This comprehensive guide will explore the causes behind this problem and provide actionable solutions to ensure your website is properly indexed and ranks well in search results.
Before delving into the solutions, it’s essential to grasp what “Discovered – Currently Not Indexed” means in the context of search engine optimization. When a search engine’s web crawler, like Googlebot, discovers a new webpage on your site, it logs the URL and content but may not immediately add it to its index. This status typically arises due to various reasons, such as technical issues, content quality, or crawl budget limitations.
To effectively address the issue of “Discovered – Currently Not Indexed,” it’s crucial to identify its underlying causes. Here are some common reasons:
Technical Errors: Technical issues on your website can hinder proper indexing. Problems like crawl errors, incorrect use of meta tags, and slow page loading times can lead to this status.
Low-Quality Content: Poor-quality or duplicate content often results in non-indexed pages. Search engines prioritize high-quality, unique content for their index.
Robots Meta Tag: The presence of a “noindex” directive in your page’s HTML can instruct search engines not to index it.
Crawl Budget Limitations: Search engines allocate a specific crawl budget to each website. If your website has a large number of pages or is considered less authoritative, not all pages may be indexed.
Canonicalization Issues: Canonical tags are used to specify the preferred version of a page when multiple versions with similar content exist. Misconfigured canonical tags can lead to non-indexing.
Now that we understand the common causes of “Discovered – Currently Not Indexed,” let’s explore comprehensive solutions to address these issues:
Technical Audit and SEO Optimization: Conduct a thorough technical audit of your website to identify and rectify any technical issues. Ensure that your site is mobile-friendly, loads quickly, and doesn’t have crawl errors. Regularly monitor Google Search Console for technical problems and address them promptly.
Content Quality Enhancement: Improve the quality of your website’s content. Ensure that it is original, well-researched, and relevant to your target audience. Remove duplicate content and focus on creating content that provides value to users. Use SEO best practices for on-page optimization, including the use of relevant keywords.
Robots Meta Tag Check: Examine the HTML of your webpages to ensure there are no “noindex” meta tags. You can use tools like Screaming Frog or Google Search Console to identify pages with this tag and modify it as necessary to allow indexing.
XML Sitemap Submission: Create and submit an XML sitemap to search engines. This sitemap helps search engine crawlers discover and index your pages more efficiently. Ensure that your sitemap is up to date and includes all important pages.
Optimize Crawl Budget: Optimize your website’s crawl budget by reducing the number of low-value or duplicate pages. Implement 301 redirects for any outdated or unnecessary URLs. Focus on improving the authority of your website by acquiring high-quality backlinks.
Canonicalization Correction: Review the canonical tags on your webpages to ensure they are correctly configured. Use them to consolidate duplicate content and specify the preferred version of a page.
The work doesn’t end once you’ve fixed the “Discovered – Currently Not Indexed” issue. Monitoring and ongoing SEO practices are essential to maintain your website’s indexing status. Here are some important steps:
Regular Crawling and Indexing Checks: Continue to monitor your website’s indexing status in Google Search Console. Check for any new instances of “Discovered – Currently Not Indexed” and address them promptly.
Content Updates: Keep your content fresh and updated. Regularly add new, valuable content to your site to attract both users and search engine crawlers.
Backlink Building: Invest in a backlink-building strategy to improve your website’s authority and trustworthiness. High-quality backlinks can help pages get indexed faster.
Mobile Optimization: With the increasing use of mobile devices, ensure that your website is mobile-friendly. Google places a high emphasis on mobile usability, so optimizing for mobile is crucial.
Page Speed Optimization: Page speed is a critical factor for SEO and user experience. Regularly monitor and optimize your website’s loading times.
Social Media and Content Promotion: Promote your content on social media and other online platforms to increase visibility and drive traffic to your website. Increased traffic can positively influence your indexing status.
As we move into 2024 and beyond, the field of SEO is likely to face new challenges and updates. To stay ahead, consider the following strategies:
Voice Search Optimization: With the increasing prevalence of voice-activated devices and voice search, optimize your content for voice queries. Focus on conversational and long-tail keywords.
Schema Markup: Implement schema markup to provide search engines with structured data about your content. This can enhance your listings in search results and improve click-through rates.
Core Web Vitals: Google’s Core Web Vitals update places emphasis on user experience, including factors like page speed, interactivity, and visual stability. Ensure your website meets these criteria.
E-A-T (Expertise, Authoritativeness, Trustworthiness): Google’s emphasis on E-A-T is likely to continue. Establish and demonstrate your website’s expertise, authoritativeness, and trustworthiness through high-quality content and backlinks.
Local SEO: If your business has a local presence, invest in local SEO strategies. Optimize your Google My Business listing, gather reviews, and ensure your NAP (Name, Address, Phone Number) information is consistent across the web.
Conclusion
In 2024, fixing the “Discovered – Currently Not Indexed” issue is essential for maintaining a strong online presence and visibility. By understanding the causes of this problem and implementing the solutions outlined in this comprehensive guide, you can ensure that your website is properly indexed and ranks well in search engine results. Additionally, staying proactive in monitoring your website’s SEO health and preparing for future challenges will help you stay ahead in the ever-evolving world of search engine optimization. Remember, SEO is an ongoing process, and continuous improvement is the key to online success.
Conversion rate is a critical metric for any business, representing the percentage of visitors who take a desired action, such as making a purchase or signing up for a newsletter.
Higher conversion rates can significantly impact your bottom line. Here are 20 proven strategies to effectively boost your conversion rate:
A slow-loading website can turn visitors away. Improve load times by optimizing images, using a Content Delivery Network (CDN), and simplifying your site’s design. Faster load times lead to a better user experience and increased conversions.
A/B testing involves creating two versions of a webpage or an element, such as a call-to-action (CTA) button, to see which one performs better. This data-driven approach helps you make informed changes to increase conversions.
Ensure your website is responsive and mobile-friendly. With the increasing use of smartphones, a mobile-optimized site is essential for engaging and converting mobile users.
Make the conversion process as simple and user-friendly as possible. Reduce the number of steps required for users to complete an action, like making a purchase or signing up.
Use data to segment your audience and deliver personalized content and offers based on user behavior and preferences. Personalization can boost engagement and conversions.
Ensure your website is secure with SSL certificates, and prominently display trust symbols, like the padlock icon, to reassure visitors that their data is safe.
Engage your visitors with informative and well-crafted content. Well-researched articles, videos, and product descriptions can instill confidence in your brand and drive conversions.
Exit-intent pop-ups can capture potential lost conversions by offering discounts, newsletters, or other incentives when a user is about to leave your site.
A clean, aesthetically pleasing design can enhance the user experience and drive conversions. Focus on legibility, layout, and a visually appealing design.
Remarketing strategies target users who have previously visited your site but didn’t convert. Display tailored ads to re-engage and bring them back to complete the desired action.
Integrate social sharing buttons and encourage users to share your content and products on their social channels. Social engagement can drive more conversions.
Constantly monitor and analyze your conversion data. Identify what’s working and what’s not, and make data-driven improvements to your website and strategies.
In conclusion, increasing your conversion rate involves a combination of optimizing your website, providing a great user experience, and using data-driven insights to make informed changes.
Implementing these 20 strategies can help you effectively boost your conversion rate and drive business growth. Remember that there’s no one-size-fits-all solution, so testing and refining your approach is crucial for long-term success.
In the digital age, establishing an online presence is crucial for businesses and individuals alike. One of the fundamental aspects of this process is creating a website. However, website development can be a daunting task for beginners. To simplify this journey, we have crafted a comprehensive guide to website development funnels tailored for 2024. Whether you’re a business owner looking to promote your brand, a blogger seeking an online platform, or a freelancer looking to offer your services, this guide will help you navigate the intricacies of website development with ease.
In this guide, we will walk you through the entire process, breaking it down into manageable steps. From conceptualizing your website’s purpose to choosing the right platform and design elements, we’ve got you covered. We’ll also explore effective marketing strategies, security considerations, and the importance of user experience to ensure your website’s success.
So, if you’re a beginner looking to embark on your website development journey in 2024, you’ve come to the right place. Let’s dive into the world of website development funnels and get you started on your path to online success.
To embark on your website development journey, it’s essential to have a clear understanding of the basics. In this chapter, we’ll cover the fundamental concepts, including:
1.1 Defining Your Website’s Purpose Before you begin designing your website, you must determine its purpose. Are you creating an online store, a personal blog, a portfolio, or a corporate site? Understanding your website’s primary goal will guide your decisions throughout the development process.
1.2 Identifying Your Target Audience Knowing your target audience is crucial for effective web development. Who are your potential visitors or customers, and what are their expectations? Tailoring your website to your audience’s needs is key to its success.
1.3 Setting Clear Goals and Objectives Establishing specific goals for your website helps you measure its success. These objectives could include increasing sales, growing your email list, or simply sharing valuable content. Defining your goals will guide your website’s structure and content.
Now that you’ve laid the groundwork for your website, it’s time to choose the right development platform. We’ll explore various options and factors to consider:
2.1 Content Management Systems (CMS) Content Management Systems like WordPress, Joomla, and Drupal offer user-friendly interfaces and a wide range of templates and plugins. We’ll discuss how to select the CMS that best aligns with your website’s goals.
2.2 Website Builders Website builders such as Wix, Squarespace, and Weebly are perfect for beginners. We’ll help you decide if a website builder suits your needs and which one to choose.
2.3 Custom Development For those with more specific requirements, custom development may be the best option. We’ll discuss the pros and cons of custom-built websites and how to find the right developer.
An attractive and user-friendly design is essential for keeping visitors engaged. In this chapter, we’ll delve into the principles of web design and user experience (UX):
3.1 Responsive Design In the mobile era, a responsive design that adapts to different screen sizes is crucial. We’ll explore the importance of mobile-friendliness and how to achieve it.
3.2 Navigational Structure Efficient navigation ensures visitors can find what they’re looking for. We’ll cover menu design, search functionality, and organizing your content for easy access.
3.3 Visual Elements and Branding Your website’s visuals should reflect your brand identity. We’ll discuss how to choose colors, fonts, images, and logos that resonate with your audience.
Content is king in the online world. In this chapter, we’ll focus on creating valuable content that engages your audience and enhances your website’s credibility:
4.1 Content Types We’ll explore the various content types, including text, images, videos, and infographics, and how to use them effectively.
4.2 SEO Optimization Search Engine Optimization (SEO) is crucial for improving your website’s visibility on search engines. We’ll provide an overview of SEO best practices and tools.
4.3 Content Creation Tips Learn how to write compelling blog posts, product descriptions, and landing pages. We’ll also cover the importance of maintaining a consistent posting schedule.
Ensuring the security of your website and the protection of user data is of paramount importance. In this chapter, we’ll address vital security considerations:
5.1 SSL Certificates We’ll explain the significance of SSL certificates and how to install one to secure your website’s connections.
5.2 Regular Backups Backing up your website’s data is a safeguard against potential data loss. We’ll discuss backup strategies and tools.
5.3 Security Plugins and Practices Discover security plugins and practices to protect your website from threats, such as malware and hacking attempts.
To understand how well your website is performing and where improvements are needed, you must use analytics and monitoring tools:
7.1 Google Analytics We’ll guide you through setting up Google Analytics to track website traffic, user behavior, and more.
7.2 Key Performance Indicators (KPIs) Identify the most relevant KPIs for your website’s goals and use them to measure success.
7.3 A/B Testing Learn how A/B testing can help you refine your website and marketing strategies based on user preferences.
Conclusion
Website development can be a challenging journey for beginners, but with the right guidance and resources, you can build a successful online presence. In this comprehensive guide, we’ve covered the essential aspects of website development funnels for 2024.
From understanding your website’s purpose and choosing the right platform to designing a user-friendly interface, creating valuable content, and implementing security measures, you now have the knowledge to embark on your website development journey with confidence. Remember that the digital landscape is continually evolving, and it’s essential to stay updated with the latest trends and technologies. As you begin your website development venture, continue to explore new ideas, test strategies, and adapt to the changing online environment. Your dedication and creativity will contribute to the success of your website in 2024 and beyond.
So, go ahead, take the first step, and watch your online presence flourish. Good luck on your website development journey!
YouTube has become one of the most popular platforms for sharing video content, with millions of videos being uploaded every day. With such a vast amount of content available, it can be challenging to stand out and attract viewers to your videos. This is where YouTube search optimization comes into play. By optimizing your YouTube content for organic search, you can increase your visibility and reach a larger audience.
In this comprehensive guide, we will walk you through the step-by-step process of optimizing your YouTube content for organic search. Whether you are a beginner looking to start your YouTube journey or an experienced content creator looking to improve your video’s discoverability, this guide will provide you with valuable insights and strategies to boost your YouTube channel’s growth.
Before diving into the specifics of optimizing your YouTube content for organic search, it’s essential to understand how YouTube’s algorithm works. YouTube’s algorithm is designed to help users discover content that is relevant to their interests. It takes into account various factors to determine which videos to recommend to users.
Key factors that influence YouTube’s algorithm include:
Watch Time: YouTube values videos that keep viewers engaged and watching for longer durations. The longer people watch your videos, the more likely they are to be recommended to others.
Click-Through Rate (CTR): CTR measures how often viewers click on your video when it’s displayed in search results or on the homepage. A high CTR indicates that your video’s title and thumbnail are appealing to users.
Engagement: Engagement metrics such as likes, comments, and shares indicate that your video resonates with the audience. Videos with higher engagement are more likely to be promoted.
User History: YouTube considers a user’s past viewing history to suggest videos that align with their interests and preferences.
Video Metadata: The information you provide about your video, including titles, descriptions, tags, and thumbnails, plays a crucial role in helping YouTube understand the content and context of your video.
Understanding these factors will help you make informed decisions when optimizing your content for organic search.
Keyword research is the foundation of YouTube search optimization. Identifying the right keywords will help you create content that aligns with what your target audience is searching for. Here’s how to conduct keyword research for YouTube:
Brainstorm Ideas: Start by brainstorming topics related to your niche or industry. Consider what questions your audience might have or what problems your videos can solve.
Use YouTube’s Search Suggestions: When you type a keyword into the YouTube search bar, it suggests related search terms. These suggestions can provide insight into what people are searching for.
Utilize Keyword Research Tools: Tools like Google Keyword Planner, SEMrush, and Ahrefs can help you find relevant keywords and estimate their search volume.
Check Out Your Competitors: Analyze the keywords your competitors are targeting in their video titles, descriptions, and tags. This can give you ideas for keywords to target or identify gaps in their content that you can fill.
Long-Tail Keywords: Consider targeting long-tail keywords (phrases with three or more words) as they often have less competition and can be highly specific to your content.
Assess Keyword Competition: Evaluate the competition for your chosen keywords. If a keyword is highly competitive, it may be challenging to rank for, so look for a balance between search volume and competition.
Once you’ve compiled a list of relevant keywords, you can use them to optimize your video content.
Your video title is the first thing viewers see when they come across your video in search results, so it needs to be attention-grabbing and informative. Here are some tips for crafting compelling titles:
Include the Target Keyword: Place your primary keyword at the beginning of the title if possible. This helps YouTube’s algorithm understand the video’s topic.
Be Descriptive: Clearly convey what the video is about in the title. Avoid clickbait titles that mislead viewers.
Keep it Concise: Aim for titles that are around 60 characters or less. Shorter titles are more likely to be fully displayed in search results.
Add Emotional Appeal: Consider using emotional triggers or curiosity to pique viewers’ interest. For example, “10 Tips for Explosive Growth” is more engaging than “10 Tips for Growth.”
Use Numbers: Including numbers in your titles can make your content appear more structured and actionable, such as “5 Ways to Boost Your Productivity.”
Test and Iterate: Don’t be afraid to experiment with different titles for the same video to see which one performs better. YouTube allows you to change your video’s title after uploading.
Your video description serves as an opportunity to provide more context about your video and include additional keywords. Here’s how to write effective video descriptions:
Start with a Summary: Begin your description with a brief summary of the video’s content. This gives viewers a quick idea of what to expect.
Include Keywords Naturally: Incorporate relevant keywords into your description in a natural and informative way. Avoid keyword stuffing, which can hurt your video’s rankings.
Add Timestamps: If your video covers multiple topics or sections, include timestamps in the description. This helps viewers navigate to the specific content they’re interested in.
Promote Engagement: Encourage viewers to like, comment, and subscribe to your channel within the description. Engaging with your audience can boost your video’s visibility.
Include Links: If you have relevant blog posts, social media profiles, or other resources, consider including links in the description. This can drive traffic to your other online assets.
Use Hashtags: YouTube allows you to add hashtags in your video description. Choose relevant hashtags to increase discoverability.
Mention Upcoming Content: If you have future videos or events planned, mention them in the description to keep your audience informed and engaged.
Remember that the first few lines of your description are the most visible to viewers, so prioritize important information there.
Tags are another essential element of YouTube search optimization. They help YouTube understand the context of your video and where it should be displayed in search results. Here’s how to optimize your video tags effectively:
Include Relevant Keywords: Use tags that are directly related to your video’s content. Include variations and synonyms of your primary keyword.
Prioritize Specific Tags: Specific tags are often more valuable than broad ones. For example, “how to bake chocolate chip cookies” is more targeted than just “baking.”
Use Phrases: Tags can be single words or phrases. Consider using long-tail keyword phrases in your tags.
Check Competitor Tags: Examine the tags used by top-ranking videos in your niche. You can view a video’s tags by using browser extensions or inspecting the page source.
Limit the Number of Tags: While YouTube allows you to add many tags, focus on quality over quantity. Use tags that are highly relevant to your video.
Avoid Misleading Tags: Don’t include tags that are unrelated to your video content. Misleading tags can lead to negative user experiences and lower rankings.
Experiment and Update: Periodically review and update your video tags to reflect changes in your content or keyword trends.
Thumbnails are the visual representations of your videos and play a significant role in attracting clicks. A well-designed thumbnail can make your video stand out in search results and recommendations. Here’s how to create eye-catching thumbnails:
Choose High-Quality Images: Use clear and high-resolution images for your thumbnails. Blurry or pixelated thumbnails can deter viewers.
Feature Faces and Emotions: Thumbnails that include faces with expressive emotions tend to be more engaging. Use close-up shots of faces when relevant.
Consistent Branding: Maintain a consistent visual style and branding across your thumbnails. This helps viewers recognize your content.
Add Text Overlay: Include concise and relevant text on your thumbnail to highlight the video’s topic or key points. Use easy-to-read fonts and contrasting colors.
Test Thumbnail Variations: Experiment with different thumbnail designs to see which ones perform best. YouTube allows you to A/B test thumbnails for videos.
Follow YouTube’s Guidelines: Ensure your thumbnails adhere to YouTube’s guidelines regarding content and graphic elements.
Remember that your thumbnail should accurately represent the content of your video. Avoid using misleading or clickbait thumbnails, as this can harm your channel’s reputation.
Optimizing for search is essential, but the quality of your content is equally important. YouTube values high-quality, engaging videos, and viewers are more likely to return to your channel if they find value in your content. Here are tips for uploading high-quality content:
Invest in Equipment: Use good-quality cameras, microphones, and lighting to improve the production quality of your videos.
Plan Your Content: Create a content plan or script to ensure that your videos are well-structured and deliver value to your audience.
Edit Professionally: Edit your videos to remove mistakes, add graphics or animations, and enhance overall quality. Use video editing software for this purpose.
Maintain Consistency: Stick to a consistent posting schedule so that your audience knows when to expect new content.
Engage Early: Encourage viewers to engage with your video (likes, comments, shares) early on, as this can boost its visibility.
Monitor Audience Retention: Pay attention to your video’s audience retention metrics in YouTube Analytics. Identify when viewers drop off and make adjustments to keep them engaged.
Optimize for Mobile: Many viewers watch YouTube on mobile devices, so ensure that your content is mobile-friendly and easily accessible.
Create Eye-Catching Intros: The first few seconds of your video are crucial. Grab viewers’ attention with an engaging intro that relates to the video’s topic.
Building a community around your YouTube channel is vital for long-term success. Engaging with your audience helps foster a loyal following. Here are some ways to interact with your viewers:
Respond to Comments: Take the time to reply to comments on your videos. Engage in meaningful conversations with your audience and answer their questions.
Host Live Streams: Live streams provide an opportunity for real-time interaction with your audience. You can answer questions, discuss topics, and build a deeper connection.
Encourage Subscriptions: Remind viewers to subscribe to your channel at the beginning or end of your videos. Subscribers are more likely to see your new content.
Run Polls and Surveys: Use YouTube’s community tab to create polls and surveys to involve your audience in content decisions.
Share on Social Media: Promote your YouTube videos on your social media platforms to reach a broader audience and encourage cross-platform engagement.
Collaborate with Other Creators: Collaborations with other YouTubers can introduce your channel to new audiences and foster a sense of community.
Host Q&A Sessions: Periodically host Q&A sessions where you answer questions from your audience. This can deepen your connection with your viewers.
Remember that engaging with your audience not only improves your channel’s visibility but also creates a positive and loyal community.
YouTube provides valuable analytics tools to help you track the performance of your videos and channel. Regularly analyzing these metrics allows you to make data-driven decisions and optimize your content further. Key metrics to monitor include:
Watch Time: Track the total watch time on your videos. Longer watch times indicate that your content is engaging.
Audience Retention: Analyze how long viewers stay engaged with your videos. Identify points where retention drops and make improvements.
Click-Through Rate (CTR): Monitor your video’s CTR to assess the effectiveness of your titles and thumbnails.
Likes, Comments, and Shares: Measure audience engagement by tracking the number of likes, comments, and shares your videos receive.
Subscriber Growth: Keep an eye on your subscriber count to gauge your channel’s growth over time.
Traffic Sources: Understand where your video traffic is coming from, whether it’s from YouTube search, external websites, or social media.
Demographics: Learn about your audience’s demographics, such as age, gender, and location, to tailor your content accordingly.
Use the insights gained from analytics to refine your content strategy, optimize your videos, and create content that resonates with your target audience.
While organic search optimization is crucial, it’s also essential to promote your videos through various channels. Here are strategies to promote your YouTube content effectively:
Share on Social Media: Share your videos on platforms like Facebook, Twitter, Instagram, and LinkedIn to reach a broader audience.
Collaborate with Influencers: Partner with influencers in your niche who can share your video with their followers.
Email Marketing: Promote your videos to your email subscribers, as they are likely to be interested in your content.
Cross-Promote: Promote your new videos within your older videos using end screens and cards.
Participate in Online Communities: Join relevant forums, Facebook groups, or Reddit communities and share your videos when it’s appropriate and adds value to the discussion.
Utilize Your Website or Blog: Embed your YouTube videos in your website or blog posts to drive traffic to your channel.
Engage in SEO for Your Website: Optimize your website for search engines to increase the chances of your videos appearing in web search results.
Paid Advertising: Consider using YouTube’s advertising platform to run targeted ad campaigns to reach a broader audience.
Remember that promoting your videos is an ongoing process, and consistency is key to building a dedicated viewership.
Chapter 11: Conclusion
Optimizing your YouTube content for organic search is a multifaceted process that requires a combination of keyword research, creative content creation, engagement with your audience, and continuous analysis and refinement. By following the strategies outlined in this guide, you can improve your YouTube channel’s visibility, attract a larger audience, and ultimately, achieve your content creation goals.
Keep in mind that YouTube is a dynamic platform, and trends and algorithms may change over time. Staying informed about the latest updates and adapting your strategies accordingly will help you maintain and grow your presence on YouTube. With dedication and a commitment to delivering value to your audience, you can succeed in the competitive world of YouTube content creation.
In today’s digital age, having a website for your small business is not just an option; it’s a necessity. A well-designed and well-maintained website can offer numerous benefits that can significantly impact your business’s success.
Whether you operate a local bakery, a consulting firm, or an online store, a website can help you reach new customers, enhance your credibility, and streamline your operations. In this article, we’ll explore the various benefits of a website for a small business.
Online Presence and Visibility: Having a website gives your business an online presence, allowing potential customers to find you on the internet. In an era where people search for products and services online, having a digital presence is crucial. A well-optimized website can appear in search engine results, increasing your visibility and making it easier for potential customers to discover your business.
Credibility and Trust: A professional website helps establish your business’s credibility and trustworthiness. When consumers search for information online, they are more likely to trust a business that has a polished and informative website. A well-designed site conveys a sense of professionalism and commitment to quality, which can positively influence potential customers.
Cost-Effective Marketing: Compared to traditional advertising methods like print media or television commercials, maintaining a website is cost-effective. You can showcase your products or services, share valuable content, and engage with customers at a fraction of the cost of traditional marketing channels. Additionally, online advertising through your website can be highly targeted, reaching your ideal audience efficiently.
Global Reach: With a website, your small business can reach a global audience. Unlike a physical store that is limited to a specific geographic area, your website can be accessed by anyone with an internet connection, potentially expanding your customer base far beyond your local market.
24/7 Accessibility: Your website is open 24/7, allowing customers to access information about your business and make purchases at any time, day or night. This convenience can lead to increased sales and revenue, as customers can shop on their schedule.
Improved Customer Service: A website can enhance your customer service capabilities. You can provide valuable information, answer frequently asked questions, and even offer customer support through chat bots or contact forms. This availability can lead to higher customer satisfaction and loyalty.
Showcasing Products and Services: Your website serves as a digital storefront where you can showcase your products or services in detail. High-quality images, product descriptions, and customer reviews can help potential customers make informed decisions, increasing the likelihood of a purchase.
Data Collection and Analysis: Websites allow you to gather valuable data about your customers’ behavior. You can track website traffic, analyze user demographics, and monitor which pages or products are most popular. This data can inform your marketing strategies and help you tailor your offerings to meet customer preferences.
Marketing and Promotion: A website provides a platform for marketing and promotion. You can use it to publish blog posts, share news and updates, and run promotional campaigns. Additionally, you can integrate social media and email marketing to reach and engage with your audience effectively.
Competitive Advantage: Many of your competitors likely have websites, and not having one can put your small business at a disadvantage. A well-designed website can help you stand out in a crowded marketplace and attract customers who prefer to research and purchase online.
E-commerce Opportunities: If you sell products, a website can serve as an online store, allowing you to reach customers worldwide. E-commerce capabilities can significantly expand your revenue potential and streamline the buying process for customers.
Branding and Identity: Your website is an essential part of your brand identity. You can customize it to reflect your brand’s colors, logo, and messaging, creating a consistent and memorable brand image.
Customer Feedback and Reviews: Websites provide a platform for customers to leave feedback and reviews. Positive reviews can build trust and credibility, while negative feedback allows you to address issues and improve your products or services.
Scalability: As your business grows, your website can grow with it. You can easily add new pages, products, or features to accommodate your expanding business needs.
Educational Resource: Your website can serve as an educational resource for your customers. You can provide informative articles, how-to guides, and resources related to your industry, positioning your business as an authority in your niche.
Legal Compliance: Depending on your location and industry, there may be legal requirements for businesses to have a website. Ensuring your website complies with relevant regulations can help you avoid legal issues.
Feedback and Contact: Websites often include contact forms, allowing customers to get in touch with you easily. This can facilitate communication and inquiries, ultimately leading to more business opportunities.
Analytics and Optimization: Websites offer tools and analytics platforms that allow you to track user behavior and measure the effectiveness of your online efforts. This data can help you make informed decisions and optimize your website for better performance.
Adaptability: In today’s fast-paced digital landscape, it’s essential to adapt to changing consumer preferences and technology. A website allows you to stay current and evolve with the latest trends and innovations.
Control Over Brand Image: With a website, you have control over how your brand is presented to the world. You can create a consistent and positive brand image, ensuring that your business is portrayed in the best possible light.
Reduced Geographic Limitations: Having a physical location can limit your reach, especially if you’re in a remote or less-populated area. A website breaks down those geographic barriers, allowing you to tap into a broader customer base.
Customer Insights: Through website analytics, you can gain valuable insights into customer behavior. You can see which pages they visit, how long they stay, and what actions they take. This information can guide your marketing and product development efforts.
Reduced Marketing Costs: Online marketing, including search engine optimization (SEO), content marketing, and social media promotion, can be more cost-effective than traditional marketing methods. You can target specific demographics and measure the return on investment (ROI) more accurately.
Accessibility Compliance: A well-designed website can be made accessible to individuals with disabilities, ensuring that your business is inclusive and compliant with accessibility regulations.
Customer Convenience: Customers appreciate the convenience of being able to research your business, browse products or services, and make purchases from the comfort of their own homes. This convenience can lead to increased sales and customer satisfaction.
Long-Term Investment: Building and maintaining a website is a long-term investment in your business’s future. It can continue to generate leads and revenue for your business for years to come.
Flexibility: You have the flexibility to update and change the content on your website quickly. This allows you to respond to market trends, update product offerings, and adapt to changing customer needs.
Feedback Loop: Websites can serve as a valuable feedback loop for your business. By monitoring comments, inquiries, and reviews, you can gain insights into customer preferences and areas for improvement.
Reduced Time Investment: Once your website is up and running, it can significantly reduce the time you spend on repetitive tasks like answering basic customer inquiries or processing orders manually.
Competitive Analysis: Your website can also be a tool for competitive analysis. You can study your competitors’ websites to gain insights into their strategies and discover opportunities to differentiate your business.
In conclusion, a website is an indispensable asset for small businesses in today’s digital landscape. It offers a wide range of benefits, including increased visibility, credibility, cost-effective marketing, and the ability to reach a global audience.
Whether you operate a local brick-and-mortar store or an online-only business, having a well-designed website is essential for growth and success. Investing in a website is not just an expenditure; it’s a strategic move that can yield significant returns and help your small business thrive in the digital age.
Connecting your domain to hosting is a crucial step in getting your website online. It involves configuring the domain’s DNS (Domain Name System) settings to point to the hosting server where your website’s files are stored. Here’s a step-by-step guide to help you connect your domain to hosting:
Domain Registrar Account: You should have access to your domain registrar’s account (e.g., GoDaddy, Namecheap) where you purchased the domain.
Hosting Provider Account: You’ll need access to your hosting provider’s account (e.g., Bluehost, SiteGround), where your website is hosted.
Hosting Server Information: Obtain the nameservers or IP address of your hosting server from your hosting provider. This information is crucial for pointing your domain to the correct server.
Step 2: Log In to Your Domain Registrar’s Account
Go to your domain registrar’s website (where you purchased the domain).
Log in to your account using your username and password.
Step 3: Access Domain Management
After logging in, find and navigate to the “Domain Management,” “Domain Settings,” or a similar section within your domain registrar’s dashboard. The exact location and labels may vary depending on your registrar.
Step 4: Locate Your Domain
Find the domain you want to connect to your hosting. Click on it to access its settings.
Step 5: Change Nameservers
Look for an option called “Nameservers,” “DNS Settings,” or “DNS Management.” Click on it.
Choose the option to “Use Custom Nameservers” or “Enter Custom DNS.”
Enter the nameservers provided by your hosting provider. Typically, there are two nameservers you need to enter. If you’re unsure, your hosting provider’s support documentation or customer support can provide this information.
Save or update the changes. It may take some time (usually a few hours to 48 hours) for the DNS changes to propagate across the internet. During this period, your domain will start pointing to your hosting server.
Step 6: Verify DNS Propagation
After making the DNS changes, it’s essential to verify that the changes have propagated. You can use online tools like “What’s My DNS” to check the DNS records for your domain and see if they match your hosting server’s IP address.
Step 7: Configure Hosting
Log in to your hosting provider’s account.
Access your hosting control panel (cPanel, Plesk, or a custom control panel provided by your host).
Depending on your hosting provider and control panel, you may need to add your domain to your hosting account. Look for an option like “Add Domain” or “Add Website.”
Follow the on-screen instructions to complete the domain setup. You may need to specify the directory where your website files will be stored.
Step 8: Upload Your Website
If you haven’t already, upload your website files to the directory specified during the domain setup. You can use an FTP client or the hosting provider’s file manager for this purpose.
Step 9: Test Your Website
Once your website files are uploaded and the DNS propagation has completed, you can test your website by entering your domain name in a web browser. If everything is configured correctly, your website should be accessible online.
Step 10: Secure Your Website (Optional)
Consider securing your website with an SSL certificate, especially if you plan to collect sensitive information from visitors. Many hosting providers offer free SSL certificates, and you can typically install them from your hosting control panel.
That’s it! You’ve successfully connected your domain to hosting. Keep in mind that DNS changes can take time to propagate, so don’t be alarmed if your website is not immediately accessible after making these changes.
In the vast landscape of search engine optimization (SEO), backlinks are crucial for determining a website’s authority and visibility on search engine results pages (SERPs). Backlinks, also known as inbound or incoming links, are hyperlinks from one website to another.
These links play a significant role in Google’s ranking algorithm, which is why understanding the difference between dofollow and nofollow backlinks is essential for any digital marketer or website owner. In this comprehensive guide, we will delve into the intricacies of these two types of backlinks, exploring their characteristics, importance, and impact on SEO.
Before delving into the differences between dofollow and nofollow backlinks, it’s crucial to understand what backlinks are and why they matter in the context of SEO.
Backlinks are essentially references or citations from one web page to another. When one website links to another, it signals to search engines that the linked-to content is valuable, authoritative, or relevant. This is akin to a vote of confidence or endorsement from one website to another.
Search engines, such as Google, use backlinks as one of the factors to assess a website’s trustworthiness, credibility, and authority. In Google’s eyes, the more high-quality and relevant backlinks a website has, the more likely it is to be considered an authoritative source on a particular topic or niche.
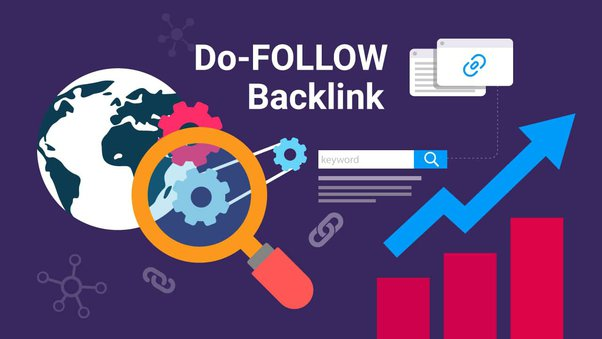
Dofollow backlinks are the primary type of backlinks that webmasters and digital marketers aim to acquire for their websites. These links pass authority and PageRank from the linking page to the linked-to page. Here’s what makes dofollow backlinks significant:
A. Passing Link Juice: Dofollow backlinks are often referred to as “follow” links because they allow search engine crawlers to follow the link and reach the linked-to page. When search engines crawl a webpage with a dofollow backlink, they distribute some of the page’s authority, also known as “link juice,” to the linked-to page. This helps improve the linked-to page’s ranking potential in search results.
B. SEO Value: Dofollow backlinks are highly coveted in the SEO world because they contribute to a website’s search engine rankings. Websites with a strong backlink profile, comprising high-quality dofollow links from authoritative sources, tend to rank higher in SERPs.
C. Natural Endorsements: When websites naturally link to another site using dofollow links, it signifies a genuine endorsement or recommendation. This is seen as a vote of confidence in the linked-to content’s quality and relevance.
D. Link Building Strategies: Many SEO professionals and webmasters engage in active link-building efforts to acquire dofollow backlinks. Strategies include guest posting, outreach to industry influencers, and content marketing campaigns. These efforts aim to secure dofollow links from reputable websites within the same niche.
E. Impact on Rankings: The presence of high-quality dofollow backlinks can significantly boost a website’s rankings, increasing its visibility and organic traffic. However, not all dofollow links are created equal; the authority and relevance of the linking domain matter.
Nofollow backlinks, as the name suggests, do not pass on link juice to the linked-to page. Introduced to the web in 2005 by major search engines (including Google), the nofollow attribute was designed to combat spammy and manipulative link-building practices. Here are the key aspects of nofollow backlinks:
A. No Link Juice Transfer: Nofollow backlinks are HTML attributes (rel=”nofollow”) added to the hyperlink code. When a search engine encounters a nofollow link, it does not follow the link to the linked-to page, and no authority or PageRank is passed.
B. Spam Control: The primary purpose of nofollow links is to combat spam. They were introduced to discourage the practice of comment spamming on blogs and forums, where spammers would leave numerous links to their websites in the hope of gaining SEO benefits. Nofollow links effectively neutralize such attempts.
C. User-Generated Content: Websites that allow user-generated content, such as blog comments and forum posts, often employ nofollow links by default to prevent spammy or low-quality links from affecting their SEO rankings.
D. Paid Links and Advertisements: It is standard practice to use nofollow attributes on paid links and advertisements to ensure transparency and compliance with search engine guidelines. This tells search engines that these links are not natural endorsements but rather paid placements.
E. Cautious Linking: Many websites use nofollow links when linking to external sources as a precautionary measure. This is often seen on news websites, where the editorial team cannot vouch for the reliability of external content.
To better understand the difference between dofollow and nofollow backlinks, it’s essential to consider their respective SEO implications.
A. Dofollow Backlinks:
SEO Boost: Dofollow backlinks are highly valuable for SEO because they can improve a website’s ranking potential by passing authority and PageRank.
Organic Traffic: Quality dofollow backlinks from authoritative websites can drive organic traffic to your site, as users are more likely to click on trusted sources.
Competitive Edge: Websites with strong dofollow backlink profiles are better positioned to outperform competitors in search engine rankings.
Link Building Efforts: SEO professionals often invest significant time and resources in acquiring dofollow backlinks through various strategies, such as guest posting and content marketing.
B. Nofollow Backlinks:
Spam Control: Nofollow links are essential for controlling spam, especially in user-generated content sections like blog comments and forums.
User Trust: Using nofollow links when linking to unverified or potentially unreliable sources can help maintain user trust by signaling that the website is cautious about its outbound links.
Compliance: Nofollow links are crucial for adhering to search engine guidelines when using paid links, advertisements, or sponsored content.
Referral Traffic: While nofollow links do not directly impact search engine rankings, they can still drive referral traffic if users click on the links.
Balancing Dofollow and Nofollow Backlinks
An effective SEO strategy often involves a balanced approach to both dofollow and nofollow backlinks. Here are some considerations for achieving this balance:
A. Content Marketing: Invest in high-quality content that attracts natural dofollow backlinks from reputable websites. Create informative, engaging, and shareable content that naturally earns endorsements from other online entities.
B. Guest Posting: Guest posting on authoritative websites within your niche is an effective way to secure dofollow backlinks. However, be mindful of creating valuable content that aligns with the host site’s audience and guidelines.
C. Nofollow for User-Generated Content: If your website allows user-generated content, implement nofollow links by default to deter spam. Regularly monitor and moderate user-generated content to maintain quality.
D. Transparency in Paid Links: When engaging in paid partnerships or advertisements, use nofollow links to adhere to search engine guidelines and ensure transparency with your audience.
E. Natural Link Earning: Encourage natural link earning by fostering relationships with influencers and other websites in your industry. Collaboration and networking can lead to valuable dofollow backlinks.
F. Link Audits: Periodically conduct link audits to assess the quality and relevance of your existing backlinks. Disavow or request the removal of low-quality or toxic backlinks that may harm your site’s SEO.
Both dofollow and nofollow backlinks can come from a wide range of sources, and not all links are equally valuable. To evaluate the quality of a backlink, consider the following factors:
A. Domain Authority: Assess the authority of the linking domain. High-authority domains are more valuable and can have a more significant impact on your SEO.
B. Relevance: Ensure that the content of the linking page is relevant to the content of your linked-to page. Relevance enhances the value of the backlink.
C. Link Placement: The placement of the link within the content matters. Links within the body of the content are generally more valuable than footer or sidebar links.
D. Anchor Text: The anchor text used for the backlink should be descriptive and relevant to the linked-to page. Natural and contextual anchor text is preferred.
E. Trustworthiness: Consider the trustworthiness of the linking website. Avoid links from spammy or low-quality websites, as they can have a detrimental effect on your SEO.
F. User Engagement: Analyze user engagement metrics, such as click-through rates (CTR) and bounce rates, for referral traffic from backlinks. High CTR and low bounce rates indicate the quality of the traffic generated by the link.
G. Diversity of Sources: Aim for a diverse set of backlink sources rather than relying heavily on a single website or type of link.
Conclusion
In summary, understanding the distinction between dofollow and nofollow backlinks is crucial for anyone involved in SEO. Dofollow backlinks are valuable for passing authority and boosting search engine rankings, while nofollow backlinks serve important purposes like spam control and user trust. A well-rounded SEO strategy involves a mix of both dofollow and nofollow backlinks.
Focus on creating high-quality content, fostering natural link earning, and adhering to best practices for link building and link attribution. By striking the right balance and prioritizing quality over quantity, you can harness the power of backlinks to enhance your website’s visibility, credibility, and success in the competitive online landscape.
Website development is an exciting and valuable skill in today’s digital age. Whether you want to create a personal blog, showcase your portfolio, start an online business, or even pursue a career as a web developer, understanding the basics of website development is essential.
This comprehensive guide is designed for beginners and covers everything you need to know to get started with website development.
Table of Contents
Introduction to Website Development
What is Website Development?
Why Learn Website Development?
The Role of a Web Developer
Web Development Basics
Front-End vs. Back-End Development
Full-Stack Development
Essential Web Technologies
Getting Started
Setting Up Your Development Environment
Choosing a Code Editor
HTML, CSS, and JavaScript: The Holy Trinity
HTML (HyperText Markup Language)
Understanding HTML Structure
Common HTML Elements
HTML Forms
HTML Semantics
CSS (Cascading Style Sheets)
Styling Your Website
CSS Selectors and Properties
CSS Box Model
CSS Flexbox and Grid Layouts
JavaScript
Introduction to JavaScript
Variables, Data Types, and Operators
Control Structures: Conditionals and Loops
Functions and Objects
Document Object Model (DOM) Manipulation
Responsive Web Design
Importance of Responsive Design
Media Queries
Flexibility and Grids
Testing Your Responsive Site
Web Hosting and Domain
Choosing a Hosting Provider
Registering a Domain Name
Connecting Domain to Hosting
Building Your First Website
Creating a Simple Web Page
Adding Style with CSS
Enhancing Interactivity with JavaScript
Version Control with Git
What is Git?
Git Basics: Clone, Commit, Push, and Pull
Using GitHub or GitLab
Web Development Frameworks
Introduction to Frameworks
Popular Front-End Frameworks (e.g., React, Vue)
Popular Back-End Frameworks (e.g., Node.js, Django, Ruby on Rails)
Content Management Systems (CMS)
What is a CMS?
Popular CMS (e.g., WordPress, Joomla, Drupal)
Customizing a CMS
Web Security
Common Security Threats
Best Practices for Website Security
SSL Certificates and HTTPS
Website Performance Optimization
Importance of Speed
Image Compression
Caching
Minification
SEO (Search Engine Optimization)
Understanding SEO
On-Page and Off-Page SEO
SEO Tools and Techniques
Web Accessibility
The Importance of Accessibility
Creating Accessible Websites
Tools and Testing for Accessibility
Launching Your Website
Final Testing
Uploading Your Website
Announcing Your Website to the World
Continuous Learning and Resources
Online Courses and Tutorials
Web Development Communities
Books and Blogs
Conclusion
Celebrating Your Progress
Next Steps in Your Web Development Journey
1. Introduction to Website Development
What is Website Development?
Website development, often simply referred to as web development, is the process of creating and maintaining websites. It encompasses a wide range of tasks and skills, including web design, front-end and back-end programming, web hosting, and website maintenance. Web developers are responsible for bringing web designs to life, making websites functional, and ensuring they work seamlessly across different devices and browsers.
Why Learn Website Development?
Learning website development offers numerous benefits:
In-Demand Skill: Web development is a highly sought-after skill in the job market, with a strong demand for web developers across various industries.
Creativity: It allows you to express your creativity by designing and building unique websites tailored to your vision.
Independence: You can create personal blogs, online portfolios, or even start your online business, giving you independence and control over your online presence.
Career Opportunities: Web development offers a wide range of career opportunities, including front-end development, back-end development, full-stack development, and specialization in areas like e-commerce or web security.
Continuous Learning: The field is dynamic, providing constant opportunities for learning and growth.
The Role of a Web Developer
A web developer’s role can vary based on their specialization, but here are some common responsibilities:
Front-End Developer: Focuses on the user interface and user experience, using HTML, CSS, and JavaScript to create visually appealing and interactive websites.
Back-End Developer: Works behind the scenes, managing server-side logic, databases, and ensuring the website’s functionality.
Full-Stack Developer: Combines both front-end and back-end development skills to create end-to-end solutions.
Web Designer: Concentrates on the website’s visual aesthetics, layout, and user experience.
Web developers often work in collaboration with designers, content creators, and other professionals to bring a website project to fruition.
2. Web Development Basics
Front-End vs. Back-End Development
Web development can be broadly categorized into two main areas: front-end and back-end development.
Front-End Development: Front-end developers focus on the part of the website that users interact with directly. This includes designing the user interface (UI), creating responsive layouts, and adding interactivity through HTML, CSS, and JavaScript.
Back-End Development: Back-end developers handle the server-side of a website. They work with databases, server logic, and APIs to ensure data is stored, retrieved, and processed securely.
Full-Stack Development
Full-stack developers have expertise in both front-end and back-end development. They can work on all aspects of a website, from designing the user interface to setting up servers and databases. Full-stack development provides a comprehensive skill set and is valuable for building complete web applications.
Essential Web Technologies
Before diving into web development, it’s essential to familiarize yourself with the core technologies:
HTML (HyperText Markup Language): HTML is the standard markup language used to create web pages. It defines the structure and content of a web page, including headings, paragraphs, images, links, and forms.
CSS (Cascading Style Sheets): CSS is used for styling web pages. It allows you to control the layout, colors, fonts, and overall visual presentation of a website.
JavaScript: JavaScript is a programming language that enables interactivity on web pages. It’s used to create dynamic elements, handle user input, and manipulate the Document Object Model (DOM).
Understanding these fundamental technologies is the first step in your journey to becoming a web developer.
3. Getting Started
Setting Up Your Development Environment
Before you start coding, you need to set up a development environment on your computer. Here’s what you’ll need:
Operating System: Most web development tools are compatible with Windows, macOS, and Linux.
Text Editor or Integrated Development Environment (IDE): Choose a code editor or IDE for writing and managing your code. Popular options include Visual Studio Code, Sublime Text, and Atom.
Web Browser: Install a modern web browser like Google Chrome, Mozilla Firefox, or Microsoft Edge for testing your websites.
Version Control System: Consider using Git for tracking changes to your code and collaborating with others.
Terminal or Command Line: Familiarize yourself with the command line interface, as you’ll use it for various development tasks.
Choosing a Code Editor
Selecting the right code editor is crucial for your workflow. Features to look for in a code editor include syntax highlighting, code autocompletion, version control integration, and a vibrant community of users and extensions.
Visual Studio Code (VS Code) is a popular choice among web developers due to its extensive features, active community, and cross-platform compatibility.
HTML, CSS, and JavaScript: The Holy Trinity
HTML, CSS, and JavaScript are the three fundamental technologies for web development.
HTML (HyperText Markup Language): HTML is used for structuring the content of web pages. It consists of tags that define elements such as headings, paragraphs, lists, links, and images.
CSS (Cascading Style Sheets): CSS is responsible for styling web pages. It controls the layout, colors, fonts, and overall visual presentation of a website.
JavaScript: JavaScript adds interactivity to web pages. It allows you to create dynamic content, handle user interactions, and make your site responsive.
As a beginner, start by learning the basics of HTML, CSS, and JavaScript, as they form the foundation of web development.
4. HTML (HyperText Markup Language)
Understanding HTML Structure
HTML uses a hierarchical structure composed of elements enclosed in tags. Elements define the content and structure of a web page. Here’s a basic HTML structure:
htmlCopy code
<!DOCTYPE html> <html> <head> <title>My Web Page</title> </head> <body> <h1>Welcome to My Website</h1> <p>This is a paragraph of text.</p> <a href="https://www.example.com">Visit Example</a> </body> </html>
<!DOCTYPE html>: This declaration specifies the document type and version of HTML.
<html>: The root element that encloses the entire HTML document.
<head>: Contains meta-information about the document, such as the page title.
<title>: Sets the title displayed in the browser tab.
<body>: The main content of the web page resides here.
<h1>, <p>, <a>: Examples of HTML elements for headings, paragraphs, and links.
Common HTML Elements
HTML offers a wide range of elements for structuring content, including headings, paragraphs, lists, links, images, forms, and more. Here are some common HTML elements:
<h1>, <h2>, <h3>: Headings of varying levels.
<p>: Paragraphs of text.
<ul>, <ol>, <li>: Unordered lists, ordered lists, and list items.
<a>: Links to other web pages or resources.
<img>: Embeds images.
<form>, <input>, <textarea>: Create interactive forms for user input.
<div> and <span>: Generic containers for styling and structuring content.
HTML Forms
Forms are essential for user interaction on websites. They allow users to submit data, such as login credentials or contact information. A basic form structure includes elements like <form>, <input>, and <button>.
<label>: Labels for form fields, linked to their corresponding input elements using the for attribute.
<input>: Input fields for text, password, checkboxes, radio buttons, and more.
<button>: Submission button for the form.
HTML Semantics
HTML5 introduced semantic elements that provide meaning to the structure of a web page. Semantic elements improve accessibility and search engine optimization. Some common semantic elements include <header>, <nav>, <main>, <article>, <section>, and <footer>. They help define the layout and purpose of different parts of a web page.
Using semantic elements makes your HTML more meaningful and improves the overall structure of your web pages.
5. CSS (Cascading Style Sheets)
Styling Your Website
CSS is responsible for styling your web pages, making them visually appealing and user-friendly. CSS styles are applied to HTML elements using selectors and properties. Here’s a simple example:
htmlCopy code
<!DOCTYPE html> <html> <head> <title>My Stylish Website</title> <style> /* CSS styles go here */ body { font-family: Arial, sans-serif; background-color: #f0f0f0; margin: 0; padding: 0; } h1 { color: #333; } p { font-size: 16px; line-height: 1.5; } </style> </head> <body> <h1>Welcome to My Stylish Website</h1> <p>This is some text with stylish formatting.</p> </body> </html>
CSS styles are enclosed within a <style> element in the HTML <head> section.
Selectors (e.g., body, h1, p) target specific HTML elements.
Properties (e.g., color, font-size) define the style characteristics.
CSS Selectors and Properties
CSS offers various selectors and properties to customize the appearance of elements. Some common selectors include:
Element Selector: Selects all instances of a specific HTML element (e.g., p selects all paragraphs).
Class Selector: Selects elements with a specific class attribute (e.g., .highlight selects all elements with class="highlight").
ID Selector: Selects a single element with a specific ID attribute (e.g., #header selects the element with id="header").
Descendant Selector: Selects elements that are descendants of a specified element (e.g., ul li selects all list items within unordered lists).
CSS properties control various aspects of element styling, such as color, font-size, margin, padding, border, and more.
CSS Box Model
Understanding the CSS box model is essential for layout design. It consists of content, padding, border, and margin. The model defines how space is allocated around and within elements.
Content: The actual content of the element.
Padding: Space between the content and the element’s border.
Border: A border around the padding.
Margin: Space between the element’s border and adjacent elements.
CSS Flexbox and Grid Layouts
Flexbox and Grid Layout are CSS techniques for creating responsive and flexible layouts.
Flexbox: It’s ideal for one-dimensional layouts, such as arranging items in a row or column. It simplifies alignment and distribution of space within a container.
Grid Layout: Grid is suitable for two-dimensional layouts. It allows you to create complex grid structures with rows and columns.
Both Flexbox and Grid Layout enhance your ability to create modern and responsive web designs.
6. JavaScript
Introduction to JavaScript
JavaScript is a versatile programming language that adds interactivity and functionality to web pages. It allows you to create dynamic content, handle user input, and manipulate the Document Object Model (DOM). JavaScript is essential for building modern web applications.
Here’s a basic example of JavaScript:
htmlCopy code
<!DOCTYPE html> <html> <head> <title>My JavaScript-powered Website</title> <script> // JavaScript code goes here function greetUser() { var name = prompt("What's your name?"); alert("Hello, " + name + "!"); } </script> </head> <body> <h1>Welcome to My JavaScript-powered Website</h1> <button onclick="greetUser()">Say Hello</button> </body> </html>
JavaScript code is enclosed within <script> tags in the HTML <head> or <body> section.
In this example, a JavaScript function greetUser() is defined. It prompts the user for their name and displays a greeting.
Variables, Data Types, and Operators
JavaScript uses variables to store and manipulate data. Common data types include numbers, strings, booleans, arrays, and objects. Here’s an overview:
Variables: Declared using var, let, or const. let and const are preferred for defining variables with block scope.
Numbers: Represent both integers and floating-point numbers (e.g., 5, 3.14).
Strings: Used for text data (e.g., "Hello, World!").
Booleans: Represent true or false values (e.g., true, false).
Arrays: Ordered collections of data (e.g., [1, 2, 3]).
Objects: Key-value pairs used for complex data structures (e.g., {"name": "John", "age": 30}).
JavaScript also offers various operators for performing calculations and comparisons, such as +, -, *, /, ==, ===, >, <, &&, and ||.
Control Structures: Conditionals and Loops
Control structures enable you to make decisions and repeat actions in JavaScript.
Conditional Statements (if-else): Execute code based on specified conditions. Example:
javascriptCopy code
var age = 18; if (age >= 18) { console.log("You are an adult."); } else { console.log("You are a minor."); }
Loops (for, while): Repeat code blocks multiple times. Example using a for loop:
javascriptCopy code
for (var i = 0; i < 5; i++) { console.log("Iteration " + i); }
function addNumbers(a, b) { return a + b; } var result = addNumbers(2, 3); // result is 5
Document Object Model (DOM) Manipulation
The DOM is a programming interface for web documents. It represents the structure of an HTML document, allowing you to access and manipulate elements on a web page using JavaScript.
Here’s a simple example of changing an element’s content with JavaScript:
htmlCopy code
<!DOCTYPE html> <html> <head> <title>DOM Manipulation</title> <script> function changeText() { var element = document.getElementById("myElement"); element.textContent = "New Text!"; } </script> </head> <body> <h1 id="myElement">Click the button to change this text.</h1> <button onclick="changeText()">Change Text</button> </body> </html>
document.getElementById("myElement") selects the element with the ID “myElement.”
element.textContent = "New Text!" changes the text content of the selected element.
JavaScript’s ability to manipulate the DOM is crucial for creating dynamic and interactive web pages.
7. Responsive Web Design
Importance of Responsive Design
With the proliferation of smartphones and tablets, ensuring that your website looks and functions well on various screen sizes is essential. Responsive web design is an approach that makes web pages adapt to different devices and screen resolutions.
Key benefits of responsive design:
Improved User Experience: Users can access your site on any device without usability issues.
SEO Benefits: Search engines favor mobile-friendly websites in search results.
Cost-Efficiency: Maintaining a single responsive site is more cost-effective than separate mobile and desktop versions.
Media Queries
Media queries are CSS rules that apply different styles based on the user’s device characteristics, such as screen width, height, and orientation. They allow you to create responsive layouts that adjust to various screen sizes.
cssCopy code
/* Example of a media query */ @media screen and (max-width: 768px) { /* CSS rules for screens up to 768px wide */ body { font-size: 16px; } }
In this example, the font size is adjusted for screens with a maximum width of 768 pixels.
Flexibility and Grids
Flexbox and Grid Layout, mentioned earlier, are powerful tools for creating responsive designs. Flexbox is particularly useful for arranging elements in rows or columns, while Grid Layout excels at creating complex grid-based layouts.
Responsive design also involves using relative units like percentages for sizing elements, allowing them to adapt to the available space.
Testing Your Responsive Site
To ensure your site is responsive, test it on different devices and screen sizes. You can use browser developer tools to simulate various screen dimensions and viewports.
Additionally, consider using online testing tools and services that provide insights into your site’s performance on different devices.
Responsive design is critical for providing a consistent and user-friendly experience across all devices.
8. Web Hosting and Domain
Choosing a Hosting Provider
Web hosting is a service that allows you to store and serve your website’s files on a server connected to the internet. When choosing a hosting provider, consider factors such as:
Hosting Type: Shared hosting, virtual private servers (VPS), dedicated servers, and cloud hosting are common options.
Reliability: Ensure the host has a good uptime record and offers customer support.
Scalability: Choose a hosting plan that can accommodate your website’s growth.
Price: Compare hosting plans and pricing to find the best fit for your needs and budget.
Popular hosting providers include Bluehost, SiteGround, HostGator, and AWS (Amazon Web Services).
Registering a Domain Name
A domain name is your website’s address on the internet (e.g., www.example.com). To register a domain, follow these steps:
Choose a Domain Name: Pick a unique and memorable name for your website.
Check Availability: Use a domain registrar’s search tool to see if your chosen domain is available.
Select a Registrar: Choose a domain registrar (e.g., GoDaddy, Namecheap) to purchase and manage your domain.
Register the Domain: Follow the registrar’s instructions to complete the registration process. Be prepared to provide contact information and payment details.
Connecting Domain to Hosting
After registering a domain and obtaining hosting, you need to connect the two. This typically involves updating your domain’s DNS (Domain Name System) settings to point to your hosting provider’s servers. The exact steps depend on your domain registrar and hosting provider, so consult their documentation or support for guidance.
Once the domain is connected to your hosting, your website will be accessible via your domain name.
9. Building Your First Website
Creating a Simple Web Page
Let’s put your knowledge to use and create a basic web page. Start by creating an HTML file (e.g., index.html) and adding the following code:
htmlCopy code
<!DOCTYPE html> <html> <head> <title>My First Website</title> </head> <body> <h1>Welcome to My First Website</h1> <p>This is a simple web page created using HTML.</p> </body> </html>
This HTML code creates a webpage with a heading and a paragraph.
Adding Style with CSS
To enhance the appearance of your webpage, add CSS. Create a separate CSS file (e.g., styles.css) and include it in your HTML file like this:
htmlCopy code
<!DOCTYPE html> <html> <head> <title>My First Website</title> <link rel="stylesheet" type="text/css" href="styles.css"> </head> <body> <h1>Welcome to My First Website</h1> <p>This is a simple web page created using HTML.</p> </body> </html>
In your styles.css file, you can add styles like this:
These styles set the font, background color, and text color for your webpage.
Enhancing Interactivity with JavaScript
To add interactivity, create a JavaScript file (e.g., script.js) and link it in your HTML:
htmlCopy code
<!DOCTYPE html> <html> <head> <title>My First Website</title> <link rel="stylesheet" type="text/css" href="styles.css"> </head> <body> <h1>Welcome to My First Website</h1> <p>This is a simple web page created using HTML.</p> <button onclick="changeText()">Change Text</button> http://script.js </body> </html>
In your script.js file, you can define the changeText() function to modify the page content when the button is clicked:
javascriptCopy code
// script.js function changeText() { var paragraph = document.querySelector('p'); paragraph.textContent = 'Text changed by JavaScript!'; }
This script changes the text of the <p> element when the button is clicked.
Congratulations! You’ve created a basic webpage with HTML, CSS, and JavaScript.
10. Version Control with Git
What is Git?
Git is a distributed version control system that helps developers track changes to their code, collaborate with others, and manage codebase history. It’s an essential tool for web developers as it allows you to keep track of your project’s progress and collaborate with team members.
Git Basics: Clone, Commit, Push, and Pull
Here are some fundamental Git commands you’ll use frequently:
Clone: Create a local copy of a remote Git repository on your computer.bashCopy codegit clone <repository-url>
Commit: Record changes to the repository. Commits are like snapshots of your code.bashCopy codegit commit -m "Commit message"
Push: Upload your local commits to a remote repository, making them accessible to others.bashCopy codegit push
Pull: Fetch and merge changes from a remote repository into your local branch.bashCopy codegit pull
Git helps you maintain a history of changes, collaborate seamlessly, and resolve conflicts when multiple people work on the same project.
Using GitHub or GitLab
GitHub and GitLab are popular platforms for hosting Git repositories and collaborating on code. They provide features like issue tracking, pull requests, and continuous integration.
To get started:
Create an Account: Sign up for an account on GitHub (github.com) or GitLab (gitlab.com).
Create a Repository: On GitHub, click the “+” icon and select “New repository.” On GitLab, click “New project.” Follow the prompts to create your repository.
Push Your Code: After initializing a Git repository on your local machine, push your code to the remote repository on GitHub or GitLab using git push.
Collaborate: Invite team members to your project, create branches for new features, and collaborate using pull requests.
GitHub and GitLab offer extensive documentation and tutorials to help you make the most of these platforms.
11. Web Development Frameworks
Introduction to Frameworks
Web development frameworks are pre-built tools and libraries that streamline the development process. They provide structure, reusable components, and best practices, saving developers time and effort. Here are a few reasons to consider using a framework:
Efficiency: Frameworks offer ready-made solutions for common tasks, reducing development time.
Consistency: They enforce coding standards and practices, leading to more consistent code.
Scalability: Frameworks are designed to handle the growth of your project.
Popular Front-End Frameworks
Front-end frameworks simplify building interactive and dynamic user interfaces. Some popular front-end frameworks include:
React: Developed by Facebook, React is a component-based library for building user interfaces. It’s known for its virtual DOM and is widely used in modern web development.
Vue.js: Vue is a progressive framework for building user interfaces. It’s approachable for beginners and scales well for complex applications.
Angular: Developed by Google, Angular is a comprehensive front-end framework with a focus on building large, complex web applications. It provides a complete solution with features like data binding and routing.
Popular Back-End Frameworks
Back-end frameworks assist in building server-side logic and APIs. Here are some widely used back-end frameworks:
Node.js: Node.js is a runtime environment that allows you to run JavaScript on the server. Express.js is a popular framework that runs on Node.js and simplifies back-end development.
Django: Django is a high-level Python web framework known for its simplicity and productivity. It includes an ORM (Object-Relational Mapping) for database interaction.
Ruby on Rails: Ruby on Rails is a web application framework for Ruby. It emphasizes convention over configuration and follows the Model-View-Controller (MVC) architecture.
Choosing a framework depends on your project’s requirements, your familiarity with the programming language, and the specific features you need.
12. Content Management Systems (CMS)
What is a CMS?
A Content Management System (CMS) is a software application that simplifies the creation and management of digital content, including text, images, videos, and more. CMS platforms are widely used for building websites and web applications, especially when non-technical users need to update content regularly.
Popular CMS Platforms
Several CMS platforms cater to various needs and skill levels:
WordPress: WordPress is the most popular CMS globally, known for its user-friendliness and extensive plugin ecosystem. It’s suitable for blogs, portfolios, e-commerce, and more.
Joomla: Joomla is a flexible CMS often used for creating community-based websites, e-commerce sites, and social networks.
Drupal: Drupal is a robust and highly customizable CMS, favored for complex and enterprise-level websites.
Wix: Wix is a website builder with a user-friendly drag-and-drop interface. It’s suitable for small businesses and personal websites.
Squarespace: Squarespace offers elegant templates and a simple interface, making it ideal for artists, photographers, and creative professionals.
Customizing a CMS
While CMS platforms provide ready-made templates and features, you can customize them to suit your specific requirements. You can:
Install Themes: Choose from a variety of themes or create custom themes to change the look and feel of your site.
Use Plugins or Extensions: Extend functionality by adding plugins or extensions. For example, you can add e-commerce capabilities or integrate with social media.
Modify Templates: Customize templates to match your branding and design preferences.
Develop Custom Modules: For advanced customization, develop custom modules or plugins tailored to your needs.
CMS platforms are versatile and can accommodate a wide range of websites, from simple blogs to complex e-commerce platforms.
13. Web Security
Common Security Threats
Web security is paramount to protect your website and its users. Common security threats include:
Cross-Site Scripting (XSS): Attackers inject malicious scripts into web pages viewed by other users, compromising their security.
SQL Injection: Attackers manipulate user inputs to execute unauthorized SQL queries, potentially gaining access to a database.
Cross-Site Request Forgery (CSRF): Attackers trick users into performing unintended actions on a different site while logged into your site.
Brute Force Attacks: Attackers attempt to gain access to user accounts by repeatedly trying different passwords.
Data Breaches: Unauthorized access to sensitive user data, such as personal information or payment details.
Best Practices for Website Security
To enhance your website’s security:
Use HTTPS: Secure data transmission using HTTPS, which encrypts data between the user’s browser and the server.
Validate User Input: Ensure user inputs are validated and sanitized to prevent SQL injection and XSS attacks.
Implement Authentication and Authorization: Use strong authentication methods, and limit access based on user roles and permissions.
Update Software: Keep your CMS, plugins, and server software up to date to patch security vulnerabilities.
Back Up Regularly: Regularly back up your website to recover from security incidents or data loss.
Monitor for Suspicious Activity: Implement security monitoring to detect and respond to unusual behavior.
Use Security Headers: Add security headers to your HTTP responses to protect against various attacks.
Regularly Test for Vulnerabilities: Conduct security audits, vulnerability scans, and penetration testing to identify and fix weaknesses.
SSL Certificates and HTTPS
SSL (Secure Sockets Layer) certificates enable HTTPS encryption. They verify the identity of your website and encrypt data in transit, providing trust and security for users.
Many hosting providers offer free SSL certificates through services like Let’s Encrypt. Enable HTTPS to protect your website and boost user confidence.
Website performance directly impacts user experience, search engine rankings, and conversion rates. A fast-loading site keeps users engaged and satisfied. Here are some optimization techniques:
Image Compression
Images often make up a significant portion of a web page’s size. Use image compression techniques to reduce file sizes without sacrificing quality. Tools like ImageOptim, TinyPNG, and Squoosh can help.
Caching
Caching stores copies of your website’s static assets (e.g., images, CSS, JavaScript) on a user’s device. This reduces the need to re-download files on subsequent visits, speeding up loading times. Implement browser caching and use Content Delivery Networks (CDNs) to leverage caching.
Minification
Minification involves removing unnecessary characters (e.g., whitespace, comments) from code files (HTML, CSS, JavaScript). Smaller files load faster. Use minification tools or build processes to automate this task.
Content Delivery Networks (CDNs)
CDNs distribute your website’s content across multiple servers worldwide. When a user requests your site, the CDN delivers content from the nearest server, reducing latency. Popular CDNs include Cloudflare, Amazon CloudFront, and Akamai.
15. SEO (Search Engine Optimization)
Understanding SEO
Search Engine Optimization (SEO) is the process of improving your website’s visibility on search engines like Google. A well-optimized site ranks higher in search results, leading to more organic (non-paid) traffic.
Key aspects of SEO include:
Keyword Research: Identify relevant keywords and phrases users might search for to find your content.
On-Page SEO: Optimize individual pages by including keywords in titles, headings, and content. Improve page load times and enhance user experience.
Off-Page SEO: Build backlinks (links from other websites) to your site to demonstrate authority and credibility.
Technical SEO: Ensure proper website structure, clean code, and mobile-friendliness. Create an XML sitemap and submit it to search engines.
On-Page and Off-Page SEO
On-Page SEO: This includes optimizing content, meta tags (title and description), headings, and images. It’s about making your web pages as relevant and useful as possible to users and search engines.
Off-Page SEO: This involves building a strong online presence through backlinks, social media activity, and brand mentions. High-quality backlinks from authoritative websites are particularly important.
SEO Tools and Techniques
Several SEO tools can help you analyze your website’s performance and improve its SEO:
Google Analytics: Track website traffic, user behavior, and conversions.
Google Search Console: Monitor your site’s presence in Google search results, identify issues, and submit sitemaps.
Keyword Research Tools: Tools like Ahrefs, SEMrush, and Moz help you find relevant keywords and track your rankings.
SEO Plugins: If you’re using a CMS like WordPress, SEO plugins like Yoast SEO can assist with on-page optimization.
Link Building: Acquire high-quality backlinks through guest posting, influencer outreach, and content marketing.
Content Quality: Create high-quality, informative, and engaging content that attracts and retains users.
Mobile Optimization: Ensure your site is mobile-friendly, as Google prioritizes mobile-first indexing.
SEO is an Ongoing Process
SEO is not a one-time task; it’s an ongoing effort. Search engine algorithms change, and your competitors may also be optimizing their sites. Regularly update and improve your content, monitor your website’s performance, and adapt your SEO strategy as needed.
16. Web Accessibility
What is Web Accessibility?
Web accessibility refers to designing and developing websites and web applications that are inclusive and usable by people with disabilities. This ensures that everyone, regardless of their abilities or impairments, can access and interact with online content.
Importance of Web Accessibility
Web accessibility is essential for several reasons:
Inclusivity: It ensures that your website is usable by the broadest possible audience, including individuals with disabilities.
Legal Compliance: Many countries have laws and regulations that require websites to be accessible.
Improved User Experience: Accessibility improvements often benefit all users by enhancing navigation and usability.
SEO Benefits: Search engines favor websites with accessible, well-structured content.
Web Content Accessibility Guidelines (WCAG)
The Web Content Accessibility Guidelines (WCAG) are a set of internationally recognized standards for web accessibility. They provide a framework for creating accessible web content and applications.
The WCAG guidelines are organized into four principles:
Perceivable: Information and user interface components must be presentable to users in ways they can perceive. This includes providing text alternatives for non-text content, offering adaptable content, and creating content that can be presented in various ways.
Operable: User interface components and navigation must be operable. This includes keyboard accessibility, providing sufficient time for users to read and use content, and avoiding content that could cause seizures or physical discomfort.
Understandable: Information and operation of the user interface must be understandable. This involves clear and predictable navigation, consistent presentation, and avoiding input errors.
Robust: Content must be robust enough to be interpreted reliably by a wide variety of user agents, including assistive technologies. This includes ensuring compatibility with current and future technologies.
Use Accessibility Tools: Utilize tools like screen readers, keyboard navigation, and accessibility testing plugins to evaluate your website’s accessibility.
Conduct User Testing: Have individuals with disabilities test your website and provide feedback.
Audit Your Code: Review your HTML, CSS, and JavaScript code to ensure it complies with WCAG guidelines.
Regularly Update Content: Keep your website’s content, including multimedia, up to date and accessible.
Educate Your Team: Ensure that your development and content creation teams are knowledgeable about web accessibility best practices.
17. Launching Your Website
Pre-Launch Checklist
Before launching your website, complete the following checklist:
Domain and Hosting: Ensure your domain is connected to your hosting, and both are working correctly.
Content: Review all text, images, and multimedia to ensure they are accurate and up to date.
SEO Optimization: Optimize your website for search engines by including relevant keywords, meta tags, and a sitemap.
Mobile Responsiveness: Confirm that your site is fully responsive and displays well on various devices and screen sizes.
Browser Testing: Test your website in different web browsers (e.g., Chrome, Firefox, Safari, Edge) to ensure compatibility.
Performance Optimization: Optimize your website’s performance by compressing images, enabling caching, and minimizing HTTP requests.
Security: Implement security measures, including SSL certificates and protection against common web security threats.
Backup: Create a backup of your website’s files and database in case of data loss or emergencies.
Legal Compliance: Ensure your website complies with relevant laws and regulations, such as GDPR or ADA accessibility standards.
Launching Your Website
To launch your website:
Remove “Under Construction” Pages: Replace placeholder pages with your actual content.
Double-Check Links: Verify that all internal and external links are working correctly.
Test Forms: If your website includes forms, test them to ensure submissions are processed correctly.
Review SEO Settings: Check your website’s SEO settings and make sure they are optimized.
Backup Again: Take one final backup before the launch.
Update DNS Settings: If you’re moving your website to a new hosting provider, update DNS settings to point to the new server.
Monitor Post-Launch: Continuously monitor your website for any issues after the launch, and address them promptly.
Submit to Search Engines: Submit your sitemap to search engines like Google and Bing to expedite the indexing process.
Promote: Share your website on social media, through email marketing, and any other relevant channels to attract visitors.
Test Performance: Monitor your website’s performance after launch and make further optimizations if necessary.
Post-Launch Maintenance
Your work doesn’t end with the website launch. Regularly update content, monitor performance, and address any issues or security concerns that may arise. Keep an eye on user feedback and continually improve your site based on user needs and preferences.
18. Continuing Your Learning Journey
Web development is an ever-evolving field with new technologies and trends emerging regularly. To continue your learning journey:
Practice Regularly: Keep building websites and web applications to refine your skills.
Explore Advanced Topics: Dive into advanced web development concepts like Progressive Web Apps (PWAs), serverless architecture, and real-time web applications.
Follow Industry News: Stay updated on web development trends and technologies by following blogs, forums, and social media channels.
Join Online Communities: Participate in web development communities and forums to ask questions and share knowledge with peers.
Take Online Courses: Consider enrolling in online courses or certifications to deepen your knowledge in specific areas.
Contribute to Open Source: Get involved in open-source projects to gain experience and collaborate with other developers.
Attend Workshops and Conferences: Attend web development workshops, conferences, and meetups to network and learn from experts.
Build a Portfolio: Continue to add projects to your portfolio to showcase your skills to potential employers or clients.
Remember that web development is a dynamic field, and staying curious and adaptable is key to your success.
Conclusion
Web development for beginners is an exciting journey filled with learning opportunities. By mastering HTML, CSS, JavaScript, and other essential tools and concepts, you’ll be well on your way to creating impressive websites and web applications.
As you gain experience and explore advanced topics, you’ll have the chance to build a rewarding career in web development. Stay curious, keep learning, and enjoy your journey into the world of web development!