
Website development is an exciting and valuable skill in today’s digital age. Whether you want to create a personal blog, showcase your portfolio, start an online business, or even pursue a career as a web developer, understanding the basics of website development is essential.

This comprehensive guide is designed for beginners and covers everything you need to know to get started with website development.
Table of Contents
- Introduction to Website Development
- What is Website Development?
- Why Learn Website Development?
- The Role of a Web Developer
- Web Development Basics
- Front-End vs. Back-End Development
- Full-Stack Development
- Essential Web Technologies
- Getting Started
- Setting Up Your Development Environment
- Choosing a Code Editor
- HTML, CSS, and JavaScript: The Holy Trinity
- HTML (HyperText Markup Language)
- Understanding HTML Structure
- Common HTML Elements
- HTML Forms
- HTML Semantics
- CSS (Cascading Style Sheets)
- Styling Your Website
- CSS Selectors and Properties
- CSS Box Model
- CSS Flexbox and Grid Layouts
- JavaScript
- Introduction to JavaScript
- Variables, Data Types, and Operators
- Control Structures: Conditionals and Loops
- Functions and Objects
- Document Object Model (DOM) Manipulation
- Responsive Web Design
- Importance of Responsive Design
- Media Queries
- Flexibility and Grids
- Testing Your Responsive Site
- Web Hosting and Domain
- Choosing a Hosting Provider
- Registering a Domain Name
- Connecting Domain to Hosting
- Building Your First Website
- Creating a Simple Web Page
- Adding Style with CSS
- Enhancing Interactivity with JavaScript
- Version Control with Git
- What is Git?
- Git Basics: Clone, Commit, Push, and Pull
- Using GitHub or GitLab
- Web Development Frameworks
- Introduction to Frameworks
- Popular Front-End Frameworks (e.g., React, Vue)
- Popular Back-End Frameworks (e.g., Node.js, Django, Ruby on Rails)
- Content Management Systems (CMS)
- What is a CMS?
- Popular CMS (e.g., WordPress, Joomla, Drupal)
- Customizing a CMS
- Web Security
- Common Security Threats
- Best Practices for Website Security
- SSL Certificates and HTTPS
- Website Performance Optimization
- Importance of Speed
- Image Compression
- Caching
- Minification
- SEO (Search Engine Optimization)
- Understanding SEO
- On-Page and Off-Page SEO
- SEO Tools and Techniques
- Web Accessibility
- The Importance of Accessibility
- Creating Accessible Websites
- Tools and Testing for Accessibility
- Launching Your Website
- Final Testing
- Uploading Your Website
- Announcing Your Website to the World
- Continuous Learning and Resources
- Online Courses and Tutorials
- Web Development Communities
- Books and Blogs
- Conclusion
- Celebrating Your Progress
- Next Steps in Your Web Development Journey
1. Introduction to Website Development
What is Website Development?
Website development, often simply referred to as web development, is the process of creating and maintaining websites. It encompasses a wide range of tasks and skills, including web design, front-end and back-end programming, web hosting, and website maintenance. Web developers are responsible for bringing web designs to life, making websites functional, and ensuring they work seamlessly across different devices and browsers.
Why Learn Website Development?
Learning website development offers numerous benefits:
- In-Demand Skill: Web development is a highly sought-after skill in the job market, with a strong demand for web developers across various industries.
- Creativity: It allows you to express your creativity by designing and building unique websites tailored to your vision.
- Independence: You can create personal blogs, online portfolios, or even start your online business, giving you independence and control over your online presence.
- Career Opportunities: Web development offers a wide range of career opportunities, including front-end development, back-end development, full-stack development, and specialization in areas like e-commerce or web security.
- Continuous Learning: The field is dynamic, providing constant opportunities for learning and growth.
The Role of a Web Developer
A web developer’s role can vary based on their specialization, but here are some common responsibilities:
- Front-End Developer: Focuses on the user interface and user experience, using HTML, CSS, and JavaScript to create visually appealing and interactive websites.
- Back-End Developer: Works behind the scenes, managing server-side logic, databases, and ensuring the website’s functionality.
- Full-Stack Developer: Combines both front-end and back-end development skills to create end-to-end solutions.
- Web Designer: Concentrates on the website’s visual aesthetics, layout, and user experience.
Web developers often work in collaboration with designers, content creators, and other professionals to bring a website project to fruition.
2. Web Development Basics
Front-End vs. Back-End Development
Web development can be broadly categorized into two main areas: front-end and back-end development.
- Front-End Development: Front-end developers focus on the part of the website that users interact with directly. This includes designing the user interface (UI), creating responsive layouts, and adding interactivity through HTML, CSS, and JavaScript.
- Back-End Development: Back-end developers handle the server-side of a website. They work with databases, server logic, and APIs to ensure data is stored, retrieved, and processed securely.
Full-Stack Development
Full-stack developers have expertise in both front-end and back-end development. They can work on all aspects of a website, from designing the user interface to setting up servers and databases. Full-stack development provides a comprehensive skill set and is valuable for building complete web applications.
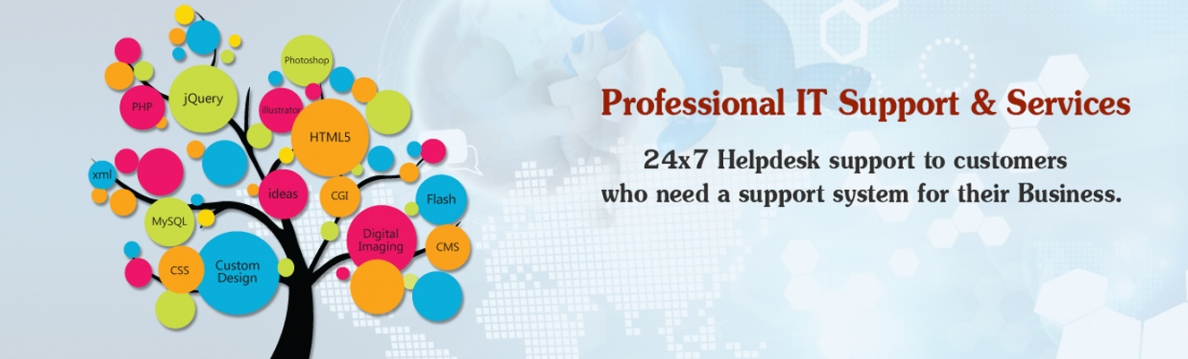
Essential Web Technologies
Before diving into web development, it’s essential to familiarize yourself with the core technologies:
- HTML (HyperText Markup Language): HTML is the standard markup language used to create web pages. It defines the structure and content of a web page, including headings, paragraphs, images, links, and forms.
- CSS (Cascading Style Sheets): CSS is used for styling web pages. It allows you to control the layout, colors, fonts, and overall visual presentation of a website.
- JavaScript: JavaScript is a programming language that enables interactivity on web pages. It’s used to create dynamic elements, handle user input, and manipulate the Document Object Model (DOM).
Understanding these fundamental technologies is the first step in your journey to becoming a web developer.
3. Getting Started
Setting Up Your Development Environment
Before you start coding, you need to set up a development environment on your computer. Here’s what you’ll need:
- Operating System: Most web development tools are compatible with Windows, macOS, and Linux.
- Text Editor or Integrated Development Environment (IDE): Choose a code editor or IDE for writing and managing your code. Popular options include Visual Studio Code, Sublime Text, and Atom.
- Web Browser: Install a modern web browser like Google Chrome, Mozilla Firefox, or Microsoft Edge for testing your websites.
- Version Control System: Consider using Git for tracking changes to your code and collaborating with others.
- Terminal or Command Line: Familiarize yourself with the command line interface, as you’ll use it for various development tasks.
Choosing a Code Editor
Selecting the right code editor is crucial for your workflow. Features to look for in a code editor include syntax highlighting, code autocompletion, version control integration, and a vibrant community of users and extensions.
Visual Studio Code (VS Code) is a popular choice among web developers due to its extensive features, active community, and cross-platform compatibility.
HTML, CSS, and JavaScript: The Holy Trinity
HTML, CSS, and JavaScript are the three fundamental technologies for web development.
- HTML (HyperText Markup Language): HTML is used for structuring the content of web pages. It consists of tags that define elements such as headings, paragraphs, lists, links, and images.
- CSS (Cascading Style Sheets): CSS is responsible for styling web pages. It controls the layout, colors, fonts, and overall visual presentation of a website.
- JavaScript: JavaScript adds interactivity to web pages. It allows you to create dynamic content, handle user interactions, and make your site responsive.
As a beginner, start by learning the basics of HTML, CSS, and JavaScript, as they form the foundation of web development.
4. HTML (HyperText Markup Language)
Understanding HTML Structure
HTML uses a hierarchical structure composed of elements enclosed in tags. Elements define the content and structure of a web page. Here’s a basic HTML structure:
htmlCopy code
<!DOCTYPE html> <html> <head> <title>My Web Page</title> </head> <body> <h1>Welcome to My Website</h1> <p>This is a paragraph of text.</p> <a href="https://www.example.com">Visit Example</a> </body> </html>
<!DOCTYPE html>: This declaration specifies the document type and version of HTML.<html>: The root element that encloses the entire HTML document.<head>: Contains meta-information about the document, such as the page title.<title>: Sets the title displayed in the browser tab.<body>: The main content of the web page resides here.<h1>,<p>,<a>: Examples of HTML elements for headings, paragraphs, and links.
Common HTML Elements
HTML offers a wide range of elements for structuring content, including headings, paragraphs, lists, links, images, forms, and more. Here are some common HTML elements:
<h1>,<h2>,<h3>: Headings of varying levels.<p>: Paragraphs of text.<ul>,<ol>,<li>: Unordered lists, ordered lists, and list items.<a>: Links to other web pages or resources.<img>: Embeds images.<form>,<input>,<textarea>: Create interactive forms for user input.<div>and<span>: Generic containers for styling and structuring content.
HTML Forms
Forms are essential for user interaction on websites. They allow users to submit data, such as login credentials or contact information. A basic form structure includes elements like <form>, <input>, and <button>.
htmlCopy code
<form> <label for="username">Username:</label> <input type="text" id="username" name="username"> <br> <label for="password">Password:</label> <input type="password" id="password" name="password"> <br> <button type="submit">Login</button> </form>
<form>: The container for form elements.<label>: Labels for form fields, linked to their corresponding input elements using theforattribute.<input>: Input fields for text, password, checkboxes, radio buttons, and more.<button>: Submission button for the form.
HTML Semantics
HTML5 introduced semantic elements that provide meaning to the structure of a web page. Semantic elements improve accessibility and search engine optimization. Some common semantic elements include <header>, <nav>, <main>, <article>, <section>, and <footer>. They help define the layout and purpose of different parts of a web page.
htmlCopy code
<header> <h1>Welcome to My Website</h1> <nav> <ul> <li><a href="#">Home</a></li> <li><a href="#">About</a></li> <li><a href="#">Contact</a></li> </ul> </nav> </header> <main> <article> <h2>Latest News</h2> <!-- News articles go here --> </article> <section> <h2>Featured Products</h2> <!-- Product listings go here --> </section> </main> <footer> <p>© 2023 My Website</p> </footer>
Using semantic elements makes your HTML more meaningful and improves the overall structure of your web pages.
5. CSS (Cascading Style Sheets)
Styling Your Website
CSS is responsible for styling your web pages, making them visually appealing and user-friendly. CSS styles are applied to HTML elements using selectors and properties. Here’s a simple example:
htmlCopy code
<!DOCTYPE html> <html> <head> <title>My Stylish Website</title> <style> /* CSS styles go here */ body { font-family: Arial, sans-serif; background-color: #f0f0f0; margin: 0; padding: 0; } h1 { color: #333; } p { font-size: 16px; line-height: 1.5; } </style> </head> <body> <h1>Welcome to My Stylish Website</h1> <p>This is some text with stylish formatting.</p> </body> </html>
- CSS styles are enclosed within a
<style>element in the HTML<head>section. - Selectors (e.g.,
body,h1,p) target specific HTML elements. - Properties (e.g.,
color,font-size) define the style characteristics.
CSS Selectors and Properties
CSS offers various selectors and properties to customize the appearance of elements. Some common selectors include:
- Element Selector: Selects all instances of a specific HTML element (e.g.,
pselects all paragraphs). - Class Selector: Selects elements with a specific class attribute (e.g.,
.highlightselects all elements withclass="highlight"). - ID Selector: Selects a single element with a specific ID attribute (e.g.,
#headerselects the element withid="header"). - Descendant Selector: Selects elements that are descendants of a specified element (e.g.,
ul liselects all list items within unordered lists).
CSS properties control various aspects of element styling, such as color, font-size, margin, padding, border, and more.
CSS Box Model
Understanding the CSS box model is essential for layout design. It consists of content, padding, border, and margin. The model defines how space is allocated around and within elements.
- Content: The actual content of the element.
- Padding: Space between the content and the element’s border.
- Border: A border around the padding.
- Margin: Space between the element’s border and adjacent elements.
CSS Flexbox and Grid Layouts
Flexbox and Grid Layout are CSS techniques for creating responsive and flexible layouts.
- Flexbox: It’s ideal for one-dimensional layouts, such as arranging items in a row or column. It simplifies alignment and distribution of space within a container.
- Grid Layout: Grid is suitable for two-dimensional layouts. It allows you to create complex grid structures with rows and columns.
Both Flexbox and Grid Layout enhance your ability to create modern and responsive web designs.
6. JavaScript
Introduction to JavaScript
JavaScript is a versatile programming language that adds interactivity and functionality to web pages. It allows you to create dynamic content, handle user input, and manipulate the Document Object Model (DOM). JavaScript is essential for building modern web applications.
Here’s a basic example of JavaScript:
htmlCopy code
<!DOCTYPE html> <html> <head> <title>My JavaScript-powered Website</title> <script> // JavaScript code goes here function greetUser() { var name = prompt("What's your name?"); alert("Hello, " + name + "!"); } </script> </head> <body> <h1>Welcome to My JavaScript-powered Website</h1> <button onclick="greetUser()">Say Hello</button> </body> </html>
- JavaScript code is enclosed within
<script>tags in the HTML<head>or<body>section. - In this example, a JavaScript function
greetUser()is defined. It prompts the user for their name and displays a greeting.
Variables, Data Types, and Operators
JavaScript uses variables to store and manipulate data. Common data types include numbers, strings, booleans, arrays, and objects. Here’s an overview:
- Variables: Declared using
var,let, orconst.letandconstare preferred for defining variables with block scope. - Numbers: Represent both integers and floating-point numbers (e.g.,
5,3.14). - Strings: Used for text data (e.g.,
"Hello, World!"). - Booleans: Represent true or false values (e.g.,
true,false). - Arrays: Ordered collections of data (e.g.,
[1, 2, 3]). - Objects: Key-value pairs used for complex data structures (e.g.,
{"name": "John", "age": 30}).
JavaScript also offers various operators for performing calculations and comparisons, such as +, -, *, /, ==, ===, >, <, &&, and ||.
Control Structures: Conditionals and Loops
Control structures enable you to make decisions and repeat actions in JavaScript.
- Conditional Statements (if-else): Execute code based on specified conditions. Example:
javascriptCopy code
var age = 18; if (age >= 18) { console.log("You are an adult."); } else { console.log("You are a minor."); }
- Loops (for, while): Repeat code blocks multiple times. Example using a
forloop:
javascriptCopy code
for (var i = 0; i < 5; i++) { console.log("Iteration " + i); }
- Functions: Encapsulate reusable code blocks. Example:
javascriptCopy code
function addNumbers(a, b) { return a + b; } var result = addNumbers(2, 3); // result is 5
Document Object Model (DOM) Manipulation
The DOM is a programming interface for web documents. It represents the structure of an HTML document, allowing you to access and manipulate elements on a web page using JavaScript.
Here’s a simple example of changing an element’s content with JavaScript:
htmlCopy code
<!DOCTYPE html> <html> <head> <title>DOM Manipulation</title> <script> function changeText() { var element = document.getElementById("myElement"); element.textContent = "New Text!"; } </script> </head> <body> <h1 id="myElement">Click the button to change this text.</h1> <button onclick="changeText()">Change Text</button> </body> </html>
document.getElementById("myElement")selects the element with the ID “myElement.”element.textContent = "New Text!"changes the text content of the selected element.
JavaScript’s ability to manipulate the DOM is crucial for creating dynamic and interactive web pages.
7. Responsive Web Design
Importance of Responsive Design
With the proliferation of smartphones and tablets, ensuring that your website looks and functions well on various screen sizes is essential. Responsive web design is an approach that makes web pages adapt to different devices and screen resolutions.
Key benefits of responsive design:
- Improved User Experience: Users can access your site on any device without usability issues.
- SEO Benefits: Search engines favor mobile-friendly websites in search results.
- Cost-Efficiency: Maintaining a single responsive site is more cost-effective than separate mobile and desktop versions.
Media Queries
Media queries are CSS rules that apply different styles based on the user’s device characteristics, such as screen width, height, and orientation. They allow you to create responsive layouts that adjust to various screen sizes.
cssCopy code
/* Example of a media query */ @media screen and (max-width: 768px) { /* CSS rules for screens up to 768px wide */ body { font-size: 16px; } }
In this example, the font size is adjusted for screens with a maximum width of 768 pixels.
Flexibility and Grids
Flexbox and Grid Layout, mentioned earlier, are powerful tools for creating responsive designs. Flexbox is particularly useful for arranging elements in rows or columns, while Grid Layout excels at creating complex grid-based layouts.
Responsive design also involves using relative units like percentages for sizing elements, allowing them to adapt to the available space.
Testing Your Responsive Site
To ensure your site is responsive, test it on different devices and screen sizes. You can use browser developer tools to simulate various screen dimensions and viewports.
Additionally, consider using online testing tools and services that provide insights into your site’s performance on different devices.
Responsive design is critical for providing a consistent and user-friendly experience across all devices.
8. Web Hosting and Domain
Choosing a Hosting Provider
Web hosting is a service that allows you to store and serve your website’s files on a server connected to the internet. When choosing a hosting provider, consider factors such as:
- Hosting Type: Shared hosting, virtual private servers (VPS), dedicated servers, and cloud hosting are common options.
- Reliability: Ensure the host has a good uptime record and offers customer support.
- Scalability: Choose a hosting plan that can accommodate your website’s growth.
- Price: Compare hosting plans and pricing to find the best fit for your needs and budget.
Popular hosting providers include Bluehost, SiteGround, HostGator, and AWS (Amazon Web Services).
Registering a Domain Name
A domain name is your website’s address on the internet (e.g., www.example.com). To register a domain, follow these steps:
- Choose a Domain Name: Pick a unique and memorable name for your website.
- Check Availability: Use a domain registrar’s search tool to see if your chosen domain is available.
- Select a Registrar: Choose a domain registrar (e.g., GoDaddy, Namecheap) to purchase and manage your domain.
- Register the Domain: Follow the registrar’s instructions to complete the registration process. Be prepared to provide contact information and payment details.
Connecting Domain to Hosting
After registering a domain and obtaining hosting, you need to connect the two. This typically involves updating your domain’s DNS (Domain Name System) settings to point to your hosting provider’s servers. The exact steps depend on your domain registrar and hosting provider, so consult their documentation or support for guidance.
Once the domain is connected to your hosting, your website will be accessible via your domain name.
9. Building Your First Website
Creating a Simple Web Page
Let’s put your knowledge to use and create a basic web page. Start by creating an HTML file (e.g., index.html) and adding the following code:
htmlCopy code
<!DOCTYPE html> <html> <head> <title>My First Website</title> </head> <body> <h1>Welcome to My First Website</h1> <p>This is a simple web page created using HTML.</p> </body> </html>
This HTML code creates a webpage with a heading and a paragraph.
Adding Style with CSS
To enhance the appearance of your webpage, add CSS. Create a separate CSS file (e.g., styles.css) and include it in your HTML file like this:
htmlCopy code
<!DOCTYPE html> <html> <head> <title>My First Website</title> <link rel="stylesheet" type="text/css" href="styles.css"> </head> <body> <h1>Welcome to My First Website</h1> <p>This is a simple web page created using HTML.</p> </body> </html>
In your styles.css file, you can add styles like this:
cssCopy code
/* styles.css */ body { font-family: Arial, sans-serif; background-color: #f0f0f0; margin: 0; padding: 0; } h1 { color: #333; } p { font-size: 16px; line-height: 1.5; }
These styles set the font, background color, and text color for your webpage.
Enhancing Interactivity with JavaScript
To add interactivity, create a JavaScript file (e.g., script.js) and link it in your HTML:
htmlCopy code
<!DOCTYPE html> <html> <head> <title>My First Website</title> <link rel="stylesheet" type="text/css" href="styles.css"> </head> <body> <h1>Welcome to My First Website</h1> <p>This is a simple web page created using HTML.</p> <button onclick="changeText()">Change Text</button> http://script.js </body> </html>
In your script.js file, you can define the changeText() function to modify the page content when the button is clicked:
javascriptCopy code
// script.js function changeText() { var paragraph = document.querySelector('p'); paragraph.textContent = 'Text changed by JavaScript!'; }
This script changes the text of the <p> element when the button is clicked.
Congratulations! You’ve created a basic webpage with HTML, CSS, and JavaScript.
10. Version Control with Git
What is Git?
Git is a distributed version control system that helps developers track changes to their code, collaborate with others, and manage codebase history. It’s an essential tool for web developers as it allows you to keep track of your project’s progress and collaborate with team members.
Git Basics: Clone, Commit, Push, and Pull
Here are some fundamental Git commands you’ll use frequently:
- Clone: Create a local copy of a remote Git repository on your computer.bashCopy code
git clone <repository-url> - Commit: Record changes to the repository. Commits are like snapshots of your code.bashCopy code
git commit -m "Commit message" - Push: Upload your local commits to a remote repository, making them accessible to others.bashCopy code
git push - Pull: Fetch and merge changes from a remote repository into your local branch.bashCopy code
git pull
Git helps you maintain a history of changes, collaborate seamlessly, and resolve conflicts when multiple people work on the same project.
Using GitHub or GitLab
GitHub and GitLab are popular platforms for hosting Git repositories and collaborating on code. They provide features like issue tracking, pull requests, and continuous integration.
To get started:
- Create an Account: Sign up for an account on GitHub (github.com) or GitLab (gitlab.com).
- Create a Repository: On GitHub, click the “+” icon and select “New repository.” On GitLab, click “New project.” Follow the prompts to create your repository.
- Push Your Code: After initializing a Git repository on your local machine, push your code to the remote repository on GitHub or GitLab using
git push. - Collaborate: Invite team members to your project, create branches for new features, and collaborate using pull requests.
GitHub and GitLab offer extensive documentation and tutorials to help you make the most of these platforms.
11. Web Development Frameworks
Introduction to Frameworks
Web development frameworks are pre-built tools and libraries that streamline the development process. They provide structure, reusable components, and best practices, saving developers time and effort. Here are a few reasons to consider using a framework:
- Efficiency: Frameworks offer ready-made solutions for common tasks, reducing development time.
- Consistency: They enforce coding standards and practices, leading to more consistent code.
- Scalability: Frameworks are designed to handle the growth of your project.
Popular Front-End Frameworks
Front-end frameworks simplify building interactive and dynamic user interfaces. Some popular front-end frameworks include:
- React: Developed by Facebook, React is a component-based library for building user interfaces. It’s known for its virtual DOM and is widely used in modern web development.
- Vue.js: Vue is a progressive framework for building user interfaces. It’s approachable for beginners and scales well for complex applications.
- Angular: Developed by Google, Angular is a comprehensive front-end framework with a focus on building large, complex web applications. It provides a complete solution with features like data binding and routing.
Popular Back-End Frameworks
Back-end frameworks assist in building server-side logic and APIs. Here are some widely used back-end frameworks:
- Node.js: Node.js is a runtime environment that allows you to run JavaScript on the server. Express.js is a popular framework that runs on Node.js and simplifies back-end development.
- Django: Django is a high-level Python web framework known for its simplicity and productivity. It includes an ORM (Object-Relational Mapping) for database interaction.
- Ruby on Rails: Ruby on Rails is a web application framework for Ruby. It emphasizes convention over configuration and follows the Model-View-Controller (MVC) architecture.
Choosing a framework depends on your project’s requirements, your familiarity with the programming language, and the specific features you need.
12. Content Management Systems (CMS)
What is a CMS?
A Content Management System (CMS) is a software application that simplifies the creation and management of digital content, including text, images, videos, and more. CMS platforms are widely used for building websites and web applications, especially when non-technical users need to update content regularly.
Popular CMS Platforms
Several CMS platforms cater to various needs and skill levels:
- WordPress: WordPress is the most popular CMS globally, known for its user-friendliness and extensive plugin ecosystem. It’s suitable for blogs, portfolios, e-commerce, and more.
- Joomla: Joomla is a flexible CMS often used for creating community-based websites, e-commerce sites, and social networks.
- Drupal: Drupal is a robust and highly customizable CMS, favored for complex and enterprise-level websites.
- Wix: Wix is a website builder with a user-friendly drag-and-drop interface. It’s suitable for small businesses and personal websites.
- Squarespace: Squarespace offers elegant templates and a simple interface, making it ideal for artists, photographers, and creative professionals.
Customizing a CMS
While CMS platforms provide ready-made templates and features, you can customize them to suit your specific requirements. You can:
- Install Themes: Choose from a variety of themes or create custom themes to change the look and feel of your site.
- Use Plugins or Extensions: Extend functionality by adding plugins or extensions. For example, you can add e-commerce capabilities or integrate with social media.
- Modify Templates: Customize templates to match your branding and design preferences.
- Develop Custom Modules: For advanced customization, develop custom modules or plugins tailored to your needs.
CMS platforms are versatile and can accommodate a wide range of websites, from simple blogs to complex e-commerce platforms.
13. Web Security
Common Security Threats
Web security is paramount to protect your website and its users. Common security threats include:
- Cross-Site Scripting (XSS): Attackers inject malicious scripts into web pages viewed by other users, compromising their security.
- SQL Injection: Attackers manipulate user inputs to execute unauthorized SQL queries, potentially gaining access to a database.
- Cross-Site Request Forgery (CSRF): Attackers trick users into performing unintended actions on a different site while logged into your site.
- Brute Force Attacks: Attackers attempt to gain access to user accounts by repeatedly trying different passwords.
- Data Breaches: Unauthorized access to sensitive user data, such as personal information or payment details.
Best Practices for Website Security
To enhance your website’s security:
- Use HTTPS: Secure data transmission using HTTPS, which encrypts data between the user’s browser and the server.
- Validate User Input: Ensure user inputs are validated and sanitized to prevent SQL injection and XSS attacks.
- Implement Authentication and Authorization: Use strong authentication methods, and limit access based on user roles and permissions.
- Update Software: Keep your CMS, plugins, and server software up to date to patch security vulnerabilities.
- Back Up Regularly: Regularly back up your website to recover from security incidents or data loss.
- Monitor for Suspicious Activity: Implement security monitoring to detect and respond to unusual behavior.
- Use Security Headers: Add security headers to your HTTP responses to protect against various attacks.
- Regularly Test for Vulnerabilities: Conduct security audits, vulnerability scans, and penetration testing to identify and fix weaknesses.
SSL Certificates and HTTPS
SSL (Secure Sockets Layer) certificates enable HTTPS encryption. They verify the identity of your website and encrypt data in transit, providing trust and security for users.
Many hosting providers offer free SSL certificates through services like Let’s Encrypt. Enable HTTPS to protect your website and boost user confidence.
14. Website Performance Optimization
Importance of Speed
Website performance directly impacts user experience, search engine rankings, and conversion rates. A fast-loading site keeps users engaged and satisfied. Here are some optimization techniques:
Image Compression
Images often make up a significant portion of a web page’s size. Use image compression techniques to reduce file sizes without sacrificing quality. Tools like ImageOptim, TinyPNG, and Squoosh can help.
Caching
Caching stores copies of your website’s static assets (e.g., images, CSS, JavaScript) on a user’s device. This reduces the need to re-download files on subsequent visits, speeding up loading times. Implement browser caching and use Content Delivery Networks (CDNs) to leverage caching.
Minification
Minification involves removing unnecessary characters (e.g., whitespace, comments) from code files (HTML, CSS, JavaScript). Smaller files load faster. Use minification tools or build processes to automate this task.
Content Delivery Networks (CDNs)
CDNs distribute your website’s content across multiple servers worldwide. When a user requests your site, the CDN delivers content from the nearest server, reducing latency. Popular CDNs include Cloudflare, Amazon CloudFront, and Akamai.
15. SEO (Search Engine Optimization)
Understanding SEO
Search Engine Optimization (SEO) is the process of improving your website’s visibility on search engines like Google. A well-optimized site ranks higher in search results, leading to more organic (non-paid) traffic.
Key aspects of SEO include:
- Keyword Research: Identify relevant keywords and phrases users might search for to find your content.
- On-Page SEO: Optimize individual pages by including keywords in titles, headings, and content. Improve page load times and enhance user experience.
- Off-Page SEO: Build backlinks (links from other websites) to your site to demonstrate authority and credibility.
- Technical SEO: Ensure proper website structure, clean code, and mobile-friendliness. Create an XML sitemap and submit it to search engines.
On-Page and Off-Page SEO
- On-Page SEO: This includes optimizing content, meta tags (title and description), headings, and images. It’s about making your web pages as relevant and useful as possible to users and search engines.
- Off-Page SEO: This involves building a strong online presence through backlinks, social media activity, and brand mentions. High-quality backlinks from authoritative websites are particularly important.
SEO Tools and Techniques
Several SEO tools can help you analyze your website’s performance and improve its SEO:
- Google Analytics: Track website traffic, user behavior, and conversions.
- Google Search Console: Monitor your site’s presence in Google search results, identify issues, and submit sitemaps.
- Keyword Research Tools: Tools like Ahrefs, SEMrush, and Moz help you find relevant keywords and track your rankings.
- SEO Plugins: If you’re using a CMS like WordPress, SEO plugins like Yoast SEO can assist with on-page optimization.
- Link Building: Acquire high-quality backlinks through guest posting, influencer outreach, and content marketing.
- Content Quality: Create high-quality, informative, and engaging content that attracts and retains users.
- Mobile Optimization: Ensure your site is mobile-friendly, as Google prioritizes mobile-first indexing.
SEO is an Ongoing Process
SEO is not a one-time task; it’s an ongoing effort. Search engine algorithms change, and your competitors may also be optimizing their sites. Regularly update and improve your content, monitor your website’s performance, and adapt your SEO strategy as needed.
16. Web Accessibility
What is Web Accessibility?
Web accessibility refers to designing and developing websites and web applications that are inclusive and usable by people with disabilities. This ensures that everyone, regardless of their abilities or impairments, can access and interact with online content.
Importance of Web Accessibility
Web accessibility is essential for several reasons:
- Inclusivity: It ensures that your website is usable by the broadest possible audience, including individuals with disabilities.
- Legal Compliance: Many countries have laws and regulations that require websites to be accessible.
- Improved User Experience: Accessibility improvements often benefit all users by enhancing navigation and usability.
- SEO Benefits: Search engines favor websites with accessible, well-structured content.
Web Content Accessibility Guidelines (WCAG)
The Web Content Accessibility Guidelines (WCAG) are a set of internationally recognized standards for web accessibility. They provide a framework for creating accessible web content and applications.
The WCAG guidelines are organized into four principles:
- Perceivable: Information and user interface components must be presentable to users in ways they can perceive. This includes providing text alternatives for non-text content, offering adaptable content, and creating content that can be presented in various ways.
- Operable: User interface components and navigation must be operable. This includes keyboard accessibility, providing sufficient time for users to read and use content, and avoiding content that could cause seizures or physical discomfort.
- Understandable: Information and operation of the user interface must be understandable. This involves clear and predictable navigation, consistent presentation, and avoiding input errors.
- Robust: Content must be robust enough to be interpreted reliably by a wide variety of user agents, including assistive technologies. This includes ensuring compatibility with current and future technologies.
Testing for Accessibility
To ensure your website is accessible:
- Use Accessibility Tools: Utilize tools like screen readers, keyboard navigation, and accessibility testing plugins to evaluate your website’s accessibility.
- Conduct User Testing: Have individuals with disabilities test your website and provide feedback.
- Audit Your Code: Review your HTML, CSS, and JavaScript code to ensure it complies with WCAG guidelines.
- Regularly Update Content: Keep your website’s content, including multimedia, up to date and accessible.
- Educate Your Team: Ensure that your development and content creation teams are knowledgeable about web accessibility best practices.
17. Launching Your Website
Pre-Launch Checklist
Before launching your website, complete the following checklist:
- Domain and Hosting: Ensure your domain is connected to your hosting, and both are working correctly.
- Content: Review all text, images, and multimedia to ensure they are accurate and up to date.
- SEO Optimization: Optimize your website for search engines by including relevant keywords, meta tags, and a sitemap.
- Mobile Responsiveness: Confirm that your site is fully responsive and displays well on various devices and screen sizes.
- Browser Testing: Test your website in different web browsers (e.g., Chrome, Firefox, Safari, Edge) to ensure compatibility.
- Performance Optimization: Optimize your website’s performance by compressing images, enabling caching, and minimizing HTTP requests.
- Security: Implement security measures, including SSL certificates and protection against common web security threats.
- Backup: Create a backup of your website’s files and database in case of data loss or emergencies.
- Legal Compliance: Ensure your website complies with relevant laws and regulations, such as GDPR or ADA accessibility standards.
Launching Your Website
To launch your website:
- Remove “Under Construction” Pages: Replace placeholder pages with your actual content.
- Double-Check Links: Verify that all internal and external links are working correctly.
- Test Forms: If your website includes forms, test them to ensure submissions are processed correctly.
- Review SEO Settings: Check your website’s SEO settings and make sure they are optimized.
- Backup Again: Take one final backup before the launch.
- Update DNS Settings: If you’re moving your website to a new hosting provider, update DNS settings to point to the new server.
- Monitor Post-Launch: Continuously monitor your website for any issues after the launch, and address them promptly.
- Submit to Search Engines: Submit your sitemap to search engines like Google and Bing to expedite the indexing process.
- Promote: Share your website on social media, through email marketing, and any other relevant channels to attract visitors.
- Test Performance: Monitor your website’s performance after launch and make further optimizations if necessary.
Post-Launch Maintenance
Your work doesn’t end with the website launch. Regularly update content, monitor performance, and address any issues or security concerns that may arise. Keep an eye on user feedback and continually improve your site based on user needs and preferences.
18. Continuing Your Learning Journey
Web development is an ever-evolving field with new technologies and trends emerging regularly. To continue your learning journey:
- Practice Regularly: Keep building websites and web applications to refine your skills.
- Explore Advanced Topics: Dive into advanced web development concepts like Progressive Web Apps (PWAs), serverless architecture, and real-time web applications.
- Follow Industry News: Stay updated on web development trends and technologies by following blogs, forums, and social media channels.
- Join Online Communities: Participate in web development communities and forums to ask questions and share knowledge with peers.
- Take Online Courses: Consider enrolling in online courses or certifications to deepen your knowledge in specific areas.
- Contribute to Open Source: Get involved in open-source projects to gain experience and collaborate with other developers.
- Attend Workshops and Conferences: Attend web development workshops, conferences, and meetups to network and learn from experts.
- Build a Portfolio: Continue to add projects to your portfolio to showcase your skills to potential employers or clients.
Remember that web development is a dynamic field, and staying curious and adaptable is key to your success.
Conclusion
Web development for beginners is an exciting journey filled with learning opportunities. By mastering HTML, CSS, JavaScript, and other essential tools and concepts, you’ll be well on your way to creating impressive websites and web applications.

As you gain experience and explore advanced topics, you’ll have the chance to build a rewarding career in web development. Stay curious, keep learning, and enjoy your journey into the world of web development!
